Note: This post contains affiliate links. As a Skillshare Affiliate and Amazon Associate I get commissions for purchases/signups made through links in this post.
This in-depth guide will teach you everything you need to know about the Asaro Head:
- what it is
- who invented it
- where to get one
- how to use it (+ exercises)
Afterwards, you will be many steps closer to mastering light and shadow on a head.
Let’s go!
Table of Contents
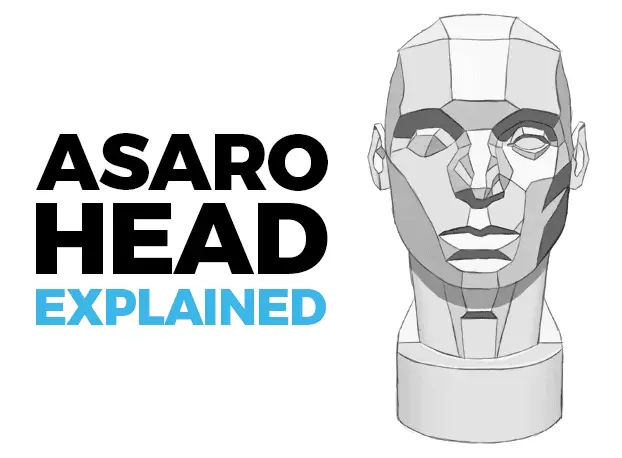
1. What Is The Asaro Head?
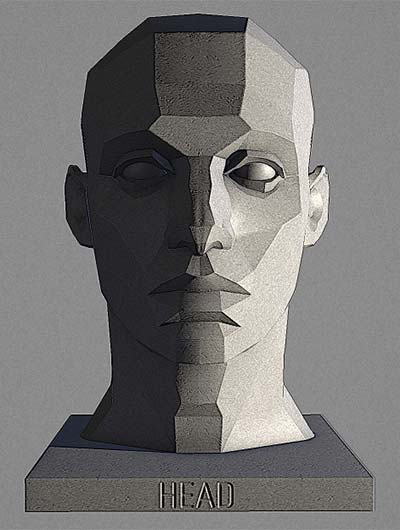
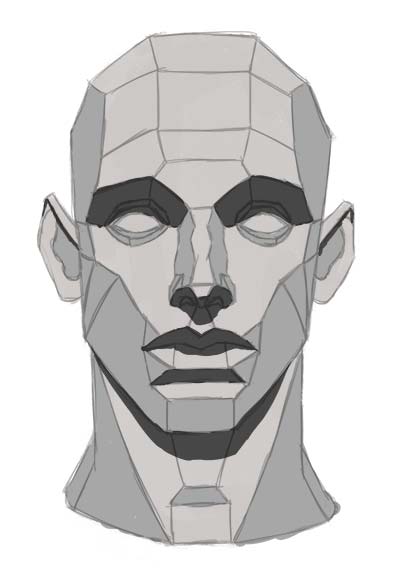
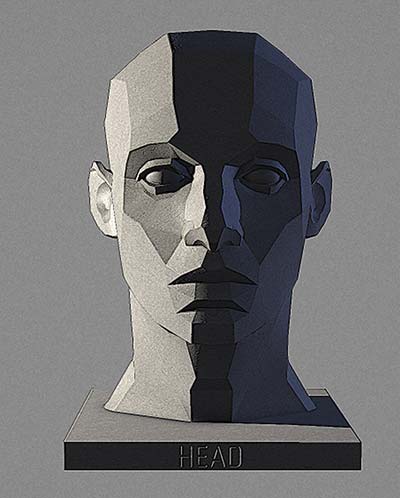
The Asaro Head is a simplification of the human head. It’s a 3D model with the goal to show you the simplified planes of the head.
It looks like this:
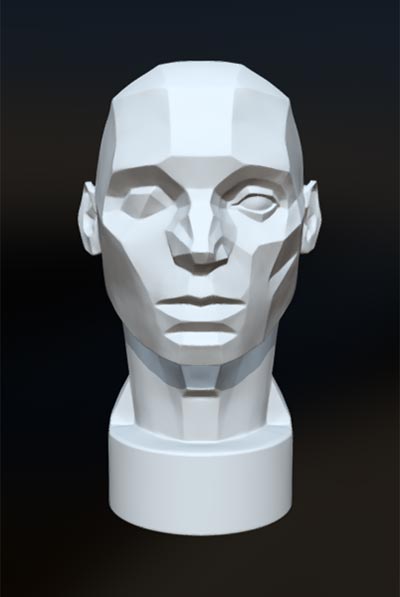
If you examine the head, you can see that it’s basically a regular human head, but has flat shapes and almost no curves.
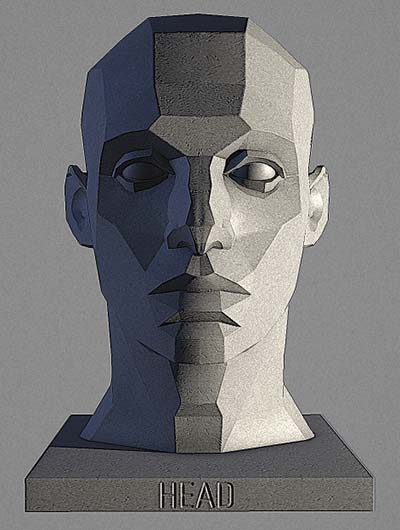
2. Why Is The Asaro Head Asymmetrical?
If you look closely, you can see that it’s actually asymmetrical:
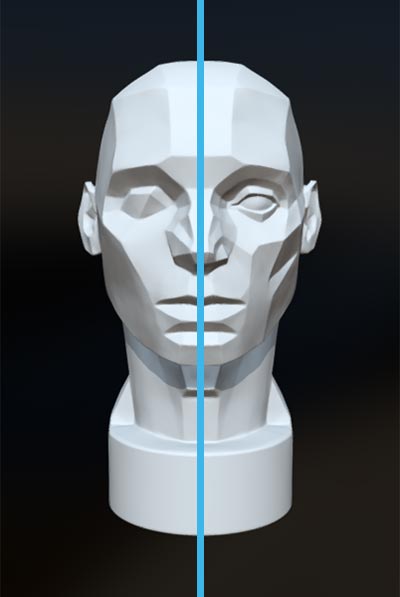
The left side of the head is a simpler variant of the right side.
Here you only see the eyeball and a flat shape on the cheek, while on the right side there are eyelids and more details in the cheek area.
The Asaro Head is asymmetrical to allow for practicing two different scenarios. A younger, more rounded face (left side) or an older, thinner face (right side). It can also be used to practice the basic shapes (left side) and add details later on (right side).
3. Who Created The Asaro Head?
The Asaro Head was created by fine artist John Asaro in 1976.
He created the model to simplify the planes of the head. This makes it easier to understand how light and shadow fall on a head.
4. Where Can I Buy The Asaro Head?
The official address to buy an Asaro Head is www.planesofthehead.com.
The standard Asaro Head is $115.
The store also offers different versions of the head, as well as simplified models of the human body.
CHECK OUT: Must-have Art Equipment I Recommend
5. Free Asaro Head 3D Model
Now, if you don’t have a real Asaro Head, don’t worry because I got the next best thing for you!
There’s a free tool on the internet.
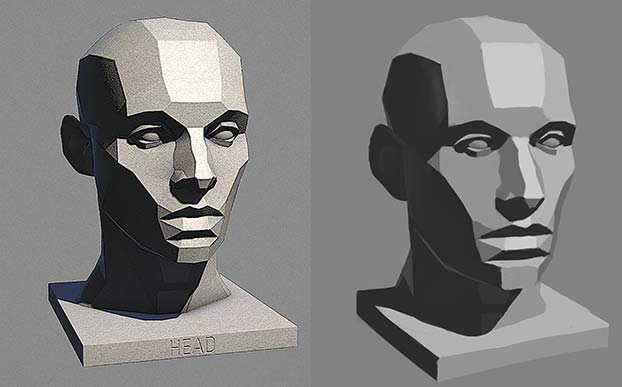
William Nguyen, a 3D character artist on Art Station, created an interactive 3D model of the Asaro Head which basically plays like a video.
Note: It’s not the exact Asaro Head – but a symmetrical head that’s very similar to the Asaro Head. The rest of the article uses this model as a base. It’s just that useful for illustration purposes!
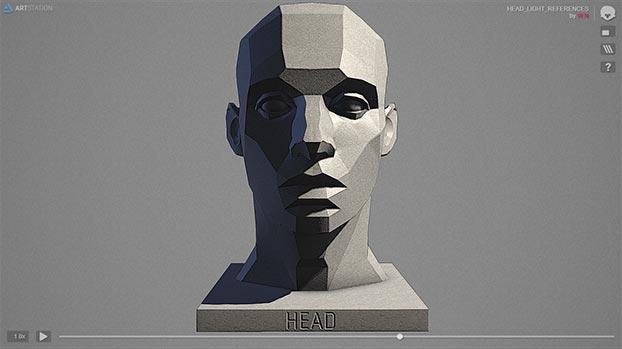
As you will see, it’s lit by a dynamic light source.
The cool thing is, if you click pause on the bottom left you will be able to pull the slider to any point you like.
This shows you many different lighting angles.
Below the head are some controls that allow you to freely move the head in any direction you want:
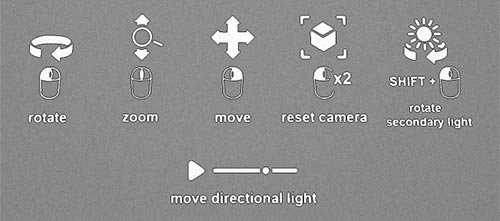
- left mouse click: rotate the head
- mouse wheel: zoom in and out
- right mouse click: move the head
- double click: reset to defaults
This really enables you to see so many of the standard lighting situations:
Lighting from the front and the side, lighting from the top and the bottom and then, most importantly, lighting from the top at an angle.
These are really the lighting situations that count – that you can often see in nature and you should know as an artist.
Here you can really clearly see how light and shadow react – especially the cast shadows of the nose and the eye sockets.
Another cool thing is that you can actually position a second light source:
- shift + left mouse click: position second light source
Let’s say you got light coming from the right:
You could, for example, position a second light source from the opposite direction (pictured in blue here):
This actually offers you the opportunity to review several lighting situations and build up on that by painting them.
6. Free Asaro Head Practice Sketches
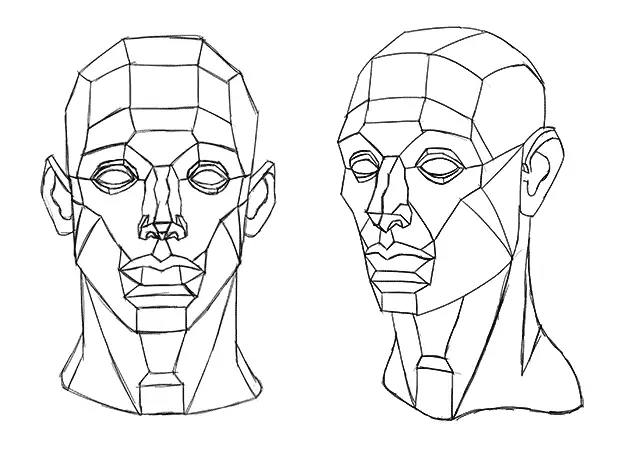
I created some free Asaro Head sketches for you to practice with.
Feel free to download them and use them as templates.
I offer JPG files, as well as TIF files (sketch + final drawing on separate layers).
7. How Do You Use The Asaro Head?
The Asaro Head is used as a light and shadow reference for painting. You can either paint the Asaro Head itself under different lighting conditions. Or you can use it as a simplified model to paint the basic lighting situation when painting a portrait.
To learn everything about painting the human head check out Marco Bucci’s course Understanding and Painting the Head. He uses the Asaro Head a lot in his lessons… and he teaches you so much more!
You’ll learn how to paint all the features, and learn all about values, color and lighting.
You can do the course for free, if you do a free trial on Skillshare.
There are several great painting exercises you can do with the Asaro Head.
If you like videos, I describe exercises #1 to #4 in these videos:
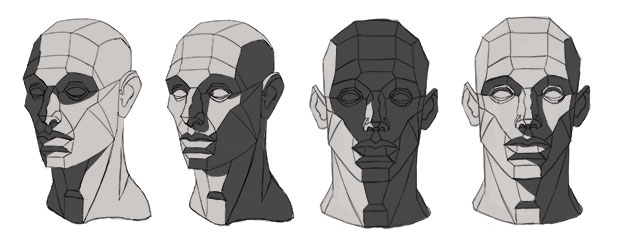
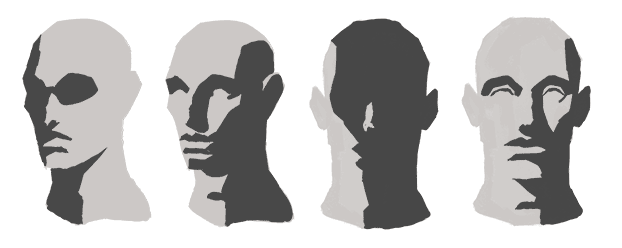
7.1 Asaro Head Exercise #1 – Paint With 2 Values
The first exercise is to simplify the Asaro Head by using just two values.
Instead of using a huge value scale that goes from very bright tones to very dark tones, use just one bright tone and one dark tone.
This helps you learn the basics of shading from the ground up because it minimizes the decisions you have to make:
You either make a plane bright or you make it dark.
The goal here is to clearly separate light and shadow.
To get better you need to paint many of these and do it from different angles and different lighting angles.
So, draw it from the front, draw the head from the side… and then use different directions of the light source. This way you really get a good feeling of how light and shadow behave on a face.
This exercise is so great because it keeps you from thinking about advanced considerations like midtones, reflected light, or even a second light source.
It really makes you focus on the fundamentals first.
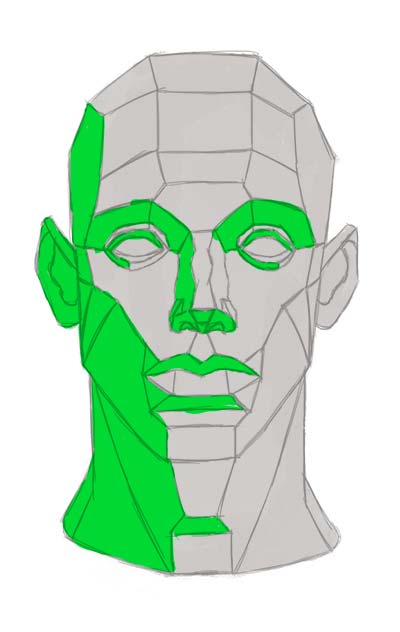
To make this process even easier you can think about it in two steps:
First, draw the form shadows which are shadows caused by a plane being turned away from the light:
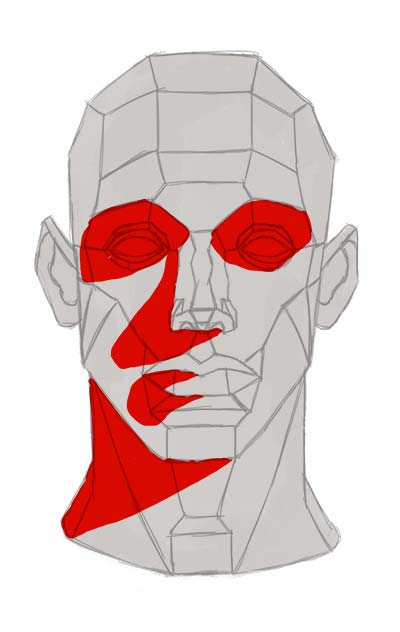
Secondly, think about the cast shadows which are shadows caused by an object blocking the light and throwing a shadow on the head.
In this case, the nose, the eye sockets, the lips, and the chin:
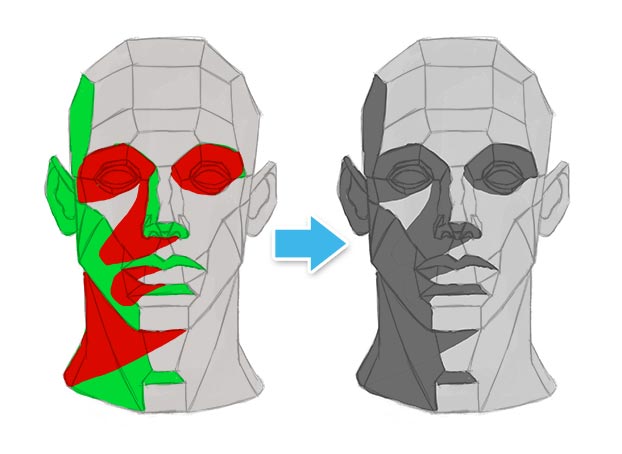
Combining these two will lead to the final product:
If you have no idea at all how to do that, I have an article covering the basics of shadows on a face.
You should notice that even using just two values these heads start to look somewhat three-dimensional already.
You can check that by disabling the outlines, one by one:
Can you see how they already look somewhat believable? That’s the goal for this exercise.
7.2 Asaro Head Exercise #2 – Paint With 3 To 5 Values
When you get comfortable doing exercise #1, you can increase the difficulty by using more values.
You can do it with three values which is one step harder:
It’s still doable, but it’s one more decision you have to make:
Not only ‘is this plane bright or dark?’ but ‘HOW dark is it?’.
And of course, the more values you add, the more difficult it becomes.
Just keep in mind though that I wouldn’t recommend using more than five values because at some point it’s just too much and defeats the purpose of the exercise which is to simplify.
Light and shadow are complicated, but you can make it simple by using only three to five values.
These exercises can really help you get the basics down fast and improve your shading quickly.
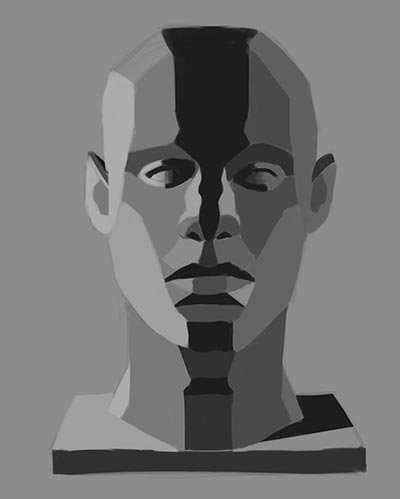
7.3 Asaro Head Exercise #3 – Paint With A Full Value Scale
The third exercise is to paint the Asaro Head with a full value scale.
Just pick one specific lighting situation you like.
Make a screenshot or photo of the head and use that as your reference image.
In this exercise, you don’t restrict your values anymore.
By practicing exercises #1 and #2, you should have gained some confidence and skill. Now you should be able to paint a full Asaro Head with many more nuances in value.
You can start with two values and go from there.
Add a third grey tone, then a fourth… until you covered every little nuance in shading.
You will most likely end up with more than five values.
Now, one important note here:
Don’t panic, if your painting doesn’t look exactly like your reference image. That is not the goal here.
This is not a drawing exercise, nor a proportion exercise, nor a perspective exercise.
This one is about light and shadow.
Just try to use it as a quick exercise for some basic light and shadow shapes and don’t try to make it perfect.
If you want to learn the best way to draw a head check out my article about head drawing methods.
Improve Faster With My FREE e-Book!
Learn how to MASTER drawing in 5 easy steps with my FREE PDF guide!
Discover a methodical way to learn drawing effectively!
7.4 Asaro Head Exercise #4 – Paint From Memory
The fourth exercise is almost the same as the third one.
The difference is that you don’t permanently look at your reference image.
What you do here is you look at the reference image for a few minutes and then switch it off.
In this case, you have to memorize all the shadow patterns of the face when you try to replicate them in your painting.
You just have this basic drawing and try to paint the light and shadow just as they were in the reference image.
Then you kind of just go on with the process until one of two things happens:
Either you made a perfect painting of the Asaro Head…
Or you feel like ‘Man, I don’t really know what I’m doing here!’ – and you’re at a loss, you don’t really remember all the values, so you just can’t replicate them perfectly.
Don’t worry though.
Just switch on the reference one more time and compare what you’ve painted with the reference image.
Then you can just mark the spots that are not as they should be and try to repaint them.
In my example here, the whole right side, the shadow area of the face, was much too bright, while some light areas were too dark.
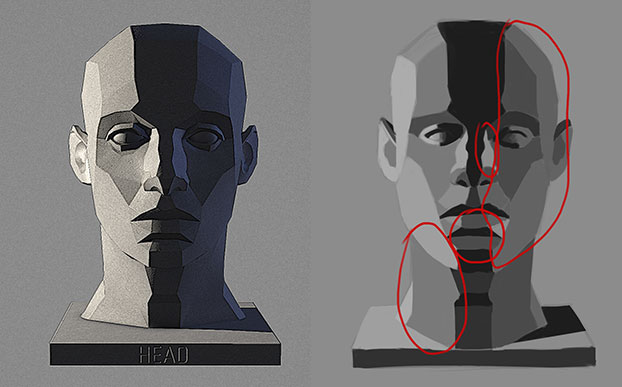
In essence, the separation between light and shadow was completely lost:
So, what I had to do here was darken the right side of the face considerably while also brightening the left side, especially the neck:
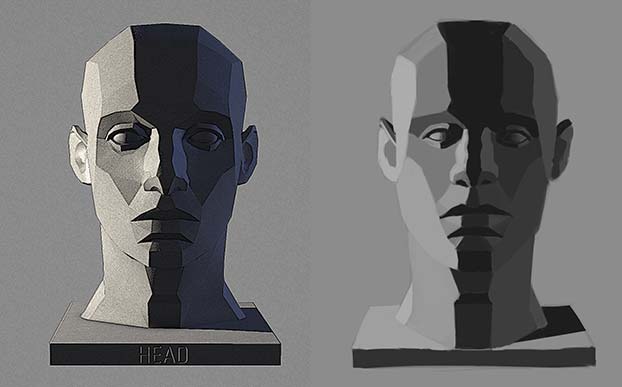
In the end, I think it’s a very good idea to directly compare the first version of your painting with the second one by switching on the layer you made the changes on.
That way, you can clearly see what your mistakes were and you can hopefully do better next time.
Conclusion
If you do these exercises often enough, you can basically get to the point where you don’t really need reference images anymore.
Your understanding of light and shadow will be so great that you can basically paint it from imagination.
And that’s when you can kind of graduate to more realistic versions of the human head – and combine this knowledge about light and shadow with your anatomy studies.
READ NEXT:
Where Are The Shadows On A Face? [And How To Draw Them]
thanks this was so helpful (:
You’re welcome! I’m always happy to help, Jessie. 🙂
Wow!! Thank you so much for this information. It’s sooo helpful! I’ve been really wanting to better understand the planes of the face & this helps immensely.
You’re welcome, Quinn!
gracias!
muy útiles tus consejos!
Thank you, Denny!
This guide to do exercises with the Asaro head is informative and helpful. Thank you. I wanted to improve my art because I want to draw and paint in the arcane style.
Great! You’re welcome! Yes, Arcane has a really cool art style. 🙂