Note: This post contains affiliate links. As a Skillshare Affiliate and Amazon Associate I get commissions for purchases/signups made through links in this post.
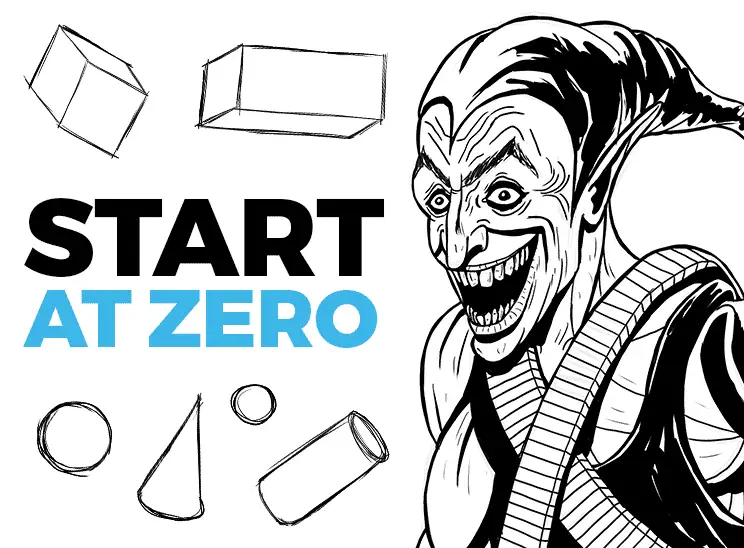
In this beginner guide to drawing, I’ll teach you all the fundamentals of drawing, step by step.
We’ll start with drawing basic lines and shapes, then we’ll transform these shapes into simple 3D objects which we’ll then put into a scene with correct perspective.
After that, I’ll show you how the principle of construction helps you draw anything you want. And finally, I’ll give you some specific tips for digital drawing.
I have good news for you, if you’re a beginner artist: You will never progress faster than in the beginning – if you do it right!
Here’s the video version of the article:
So, let’s dive right in and start with step 1:
Table of Contents
Step 1 – Draw Lines (Warmup)
If you’re completely new to drawing, the blank canvas or paper can be a bit daunting.
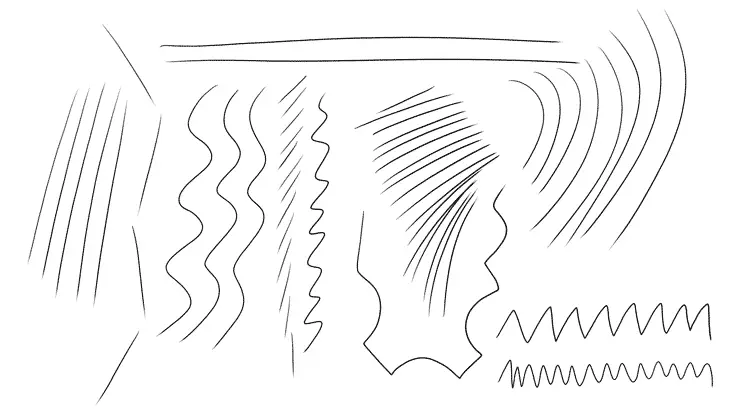
To overcome any fears you might have, you have to just jump in and start. And the easiest thing that anyone can draw is a line.
So just start drawing lines to warm up your hands. Draw some straight lines and draw some curved lines. The goal here is to just loosen up and get ready for your first drawings.
This should take a few minutes at most.
And don’t worry if your lines aren’t perfect and maybe a little wonky. It’s fine. Just try to get a feeling for the drawing pen.
Step 2 – Draw Shapes
After scribbling your first few lines on paper, the first logical step is to start drawing basic shapes.
These basic shapes are ovals, circles, triangles, rectangles, and squares: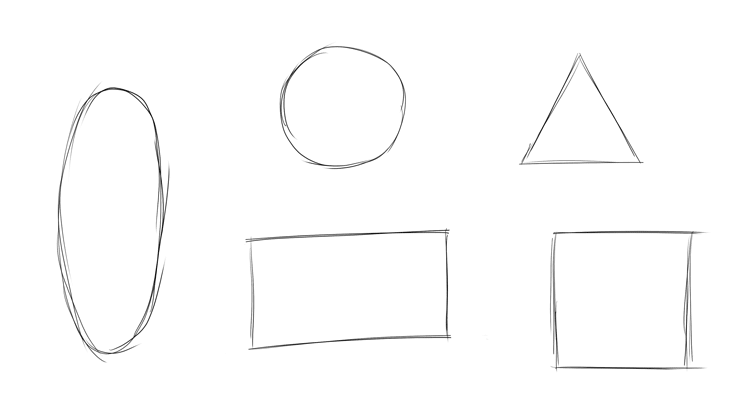
This might sound boring, but to draw 3D objects, you need to be able to draw shapes first.
Just draw these until you get the shapes right and they don’t look wonky anymore.
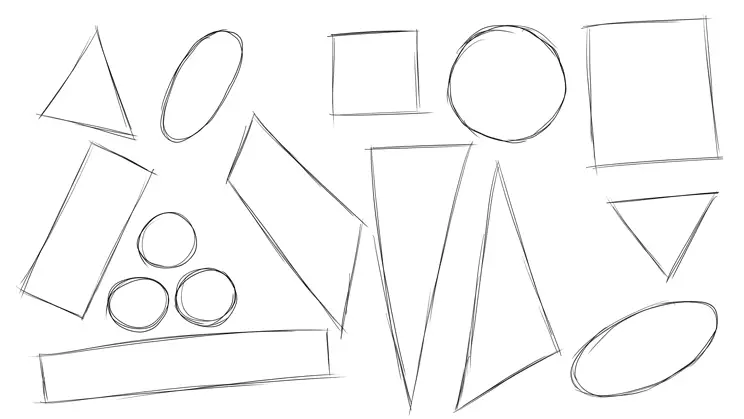
When practicing, don’t just draw the shapes straight from the front, try also rotating the shapes:
To improve the difficulty, you can try more complex shapes like stars, pentagons or hearts:
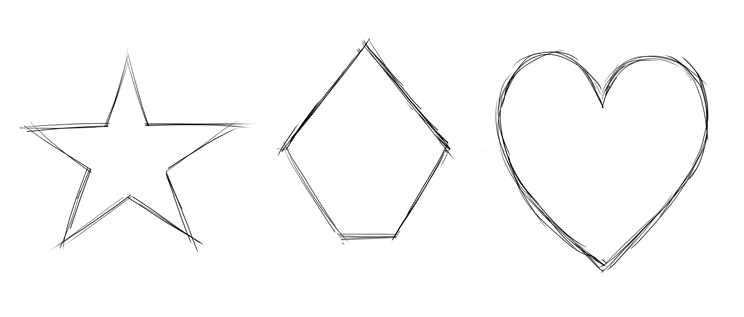
And if you want to practice shapes even more, you can just make up your own. Try combining straight and curved lines. There’s basically no limit to your creativity here:

Side note: Circles are the hardest, so don’t despair! They can even be a challenge for experienced artists!
Step 3 – Draw Forms
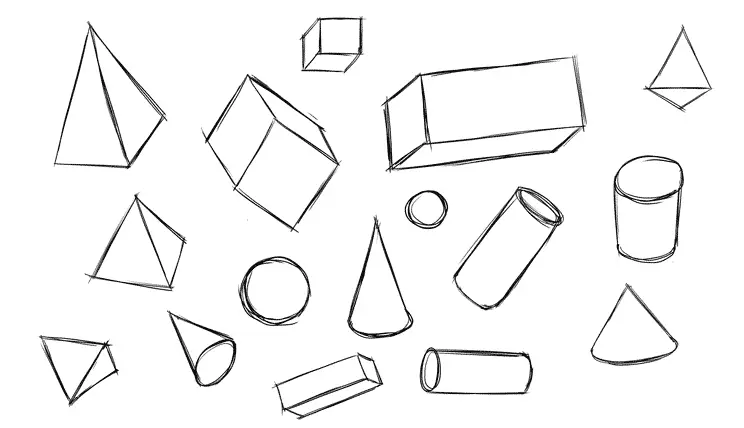
The third level is to draw actual three-dimensional forms. This is where things start to get really interesting and where you take your drawings to the next level.
The most basic forms are balls…

pyramids…
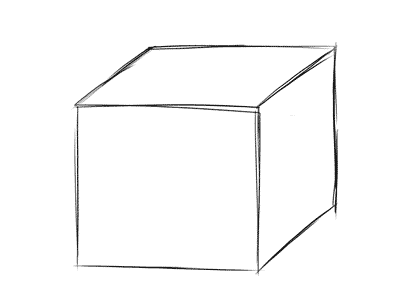
cuboids…
…and cubes:
On top of that, there are cones…

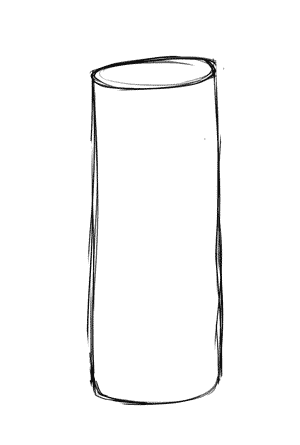
…and cylinders:
If you practice drawing basic shapes, you will soon be able to draw forms as well.
Pro trick: Start with a ball.
First, draw a circle…
…aaaand done! Yep, a ball always looks the same.
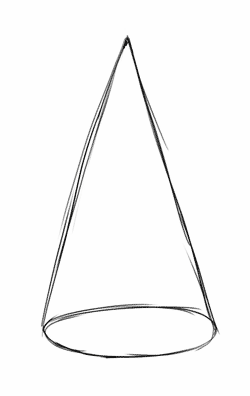
Draw A Cone
The easiest form has to be a cone.
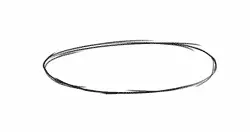
To draw that, just draw an oval:
Then draw a dot above the oval…
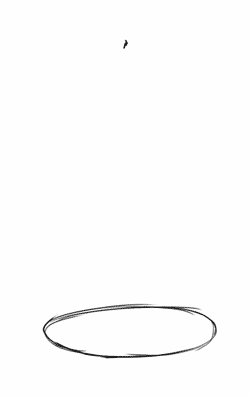
…and just connect the edges of the oval with the dot:
CHECK OUT: Must-have Art Equipment I Recommend
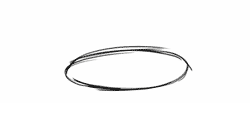
Draw A Cylinder
Next, try drawing a cylinder.
Draw an oval once again:
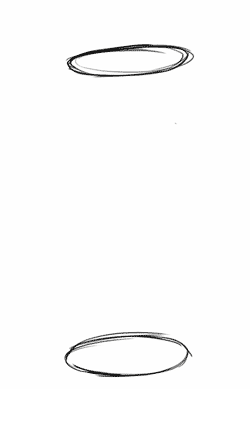
Then draw another oval above the first one:
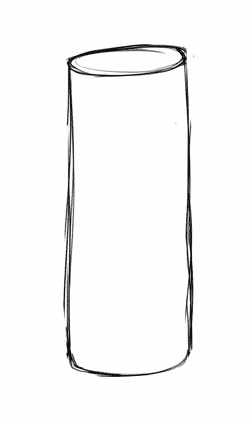
And once again, connect the edges:
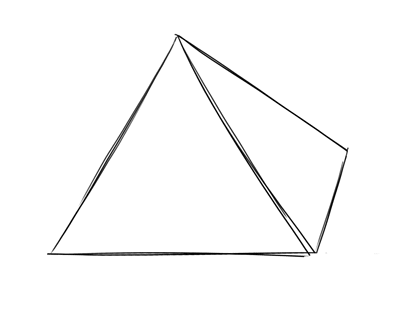
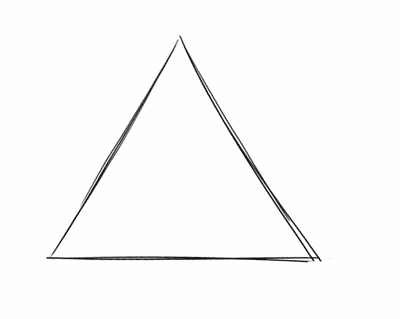
Draw A Pyramid
To draw a pyramid, start by drawing a triangle:
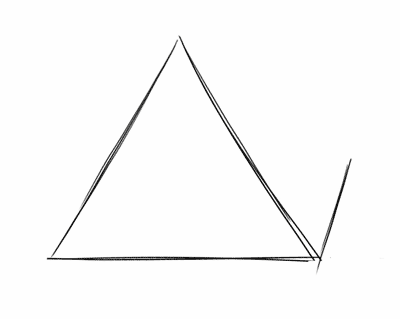
Then, add an angled line…
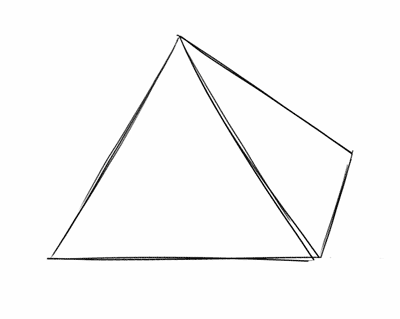
…and connect the end of the line with the tip of the triangle:
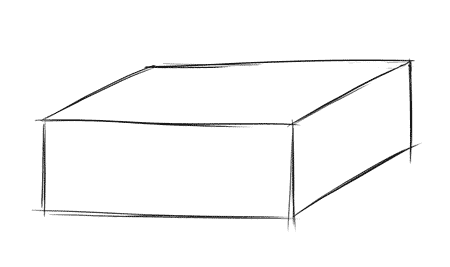
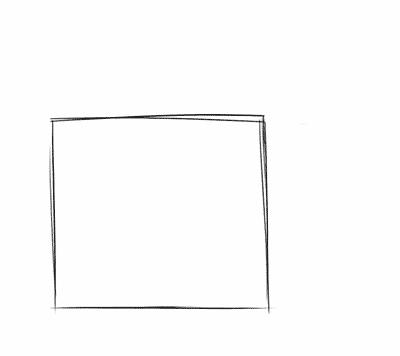
Draw A Cube
To draw a cube, start by drawing a square:
Then draw two parallel lines originating from the edges of the square:
Connect these edges with a line that’s parallel to the side of the square:
Next, draw a line that’s parallel to the new rectangle you just drew:
And finally, connect everything with a line that’s parallel to the original square:
And just like that, you learned to draw 3D forms.
Make sure to practice these for a bit. Once again, don’t just draw these from the front only – rotate the initial shapes and try different angles.
You can also draw an object that’s viewed from below by drawing lines that are angled downward.
Once you feel more confident, we can move to level 4.
Step 4 – Learn To Draw Perspective
If the forms you drew in level 3 looked weird to you, it’s probably because they weren’t in correct perspective.
To draw objects more convincingly, you need to learn 1-point and 2-point perspective.
1-Point Perspective
We’ll start with 1-point perspective.
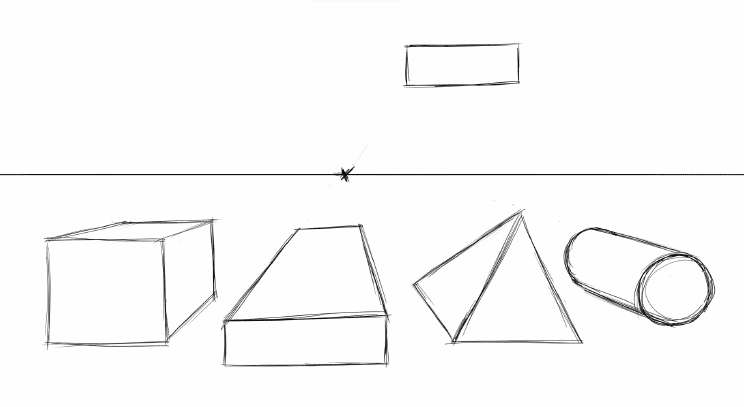
First, draw a horizontal line on the canvas. This represents the horizon.

Then, mark a point on the horizon line. This is our vanishing point. 1-point perspective is named like that because it has one vanishing point.
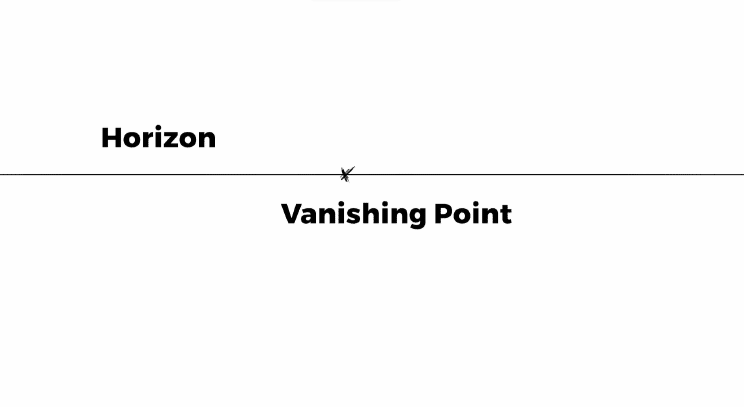
As you can see here, I’ve already drawn some basic shapes from the front:
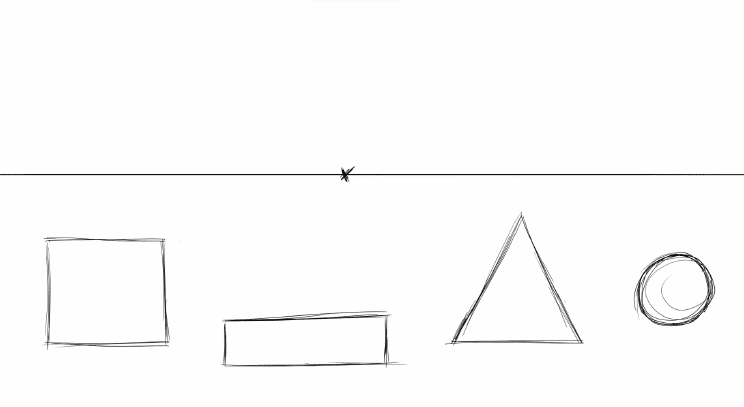
To turn these into 3D forms in correct perspective, you now need to draw the other lines of the forms.
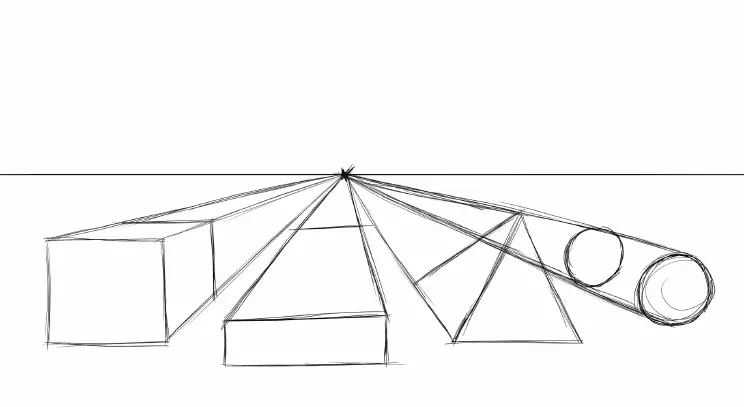
In the last step, you drew parallel lines. But in correct perspective, all lines that are pointing away from you, go in the direction of the vanishing point. So you can kind of connect the edges of your shapes with the vanishing point:

To determine the depth of your objects, all that’s left is drawing the remaining lines. To do that, you draw horizontal and vertical lines that cross the lines that go to the vanishing point. Or, in case of the pyramid, you just connect the remaining edges again.
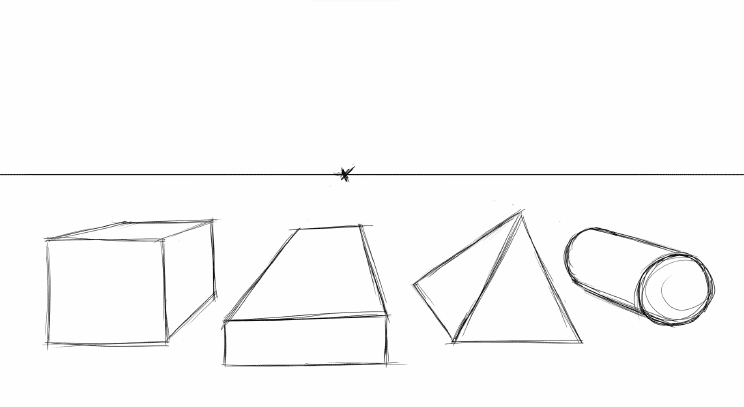
The only thing left is to erase all lines that don’t belong to the objects:
If you draw an object above the horizon line, it works the same way.
Draw a shape…
…connect the edges to the vanishing point…
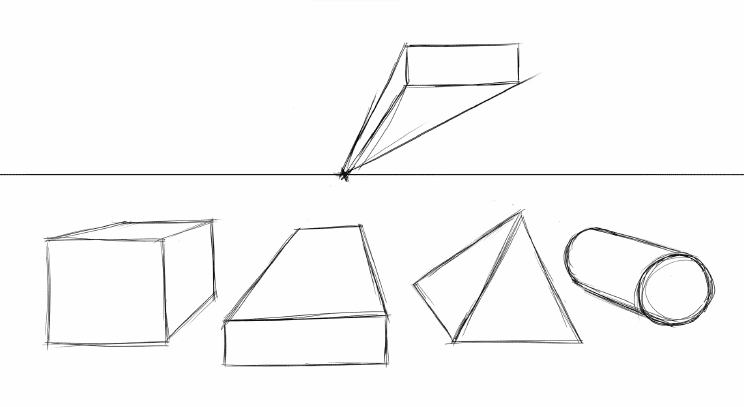
draw the rest of the object with straight lines…
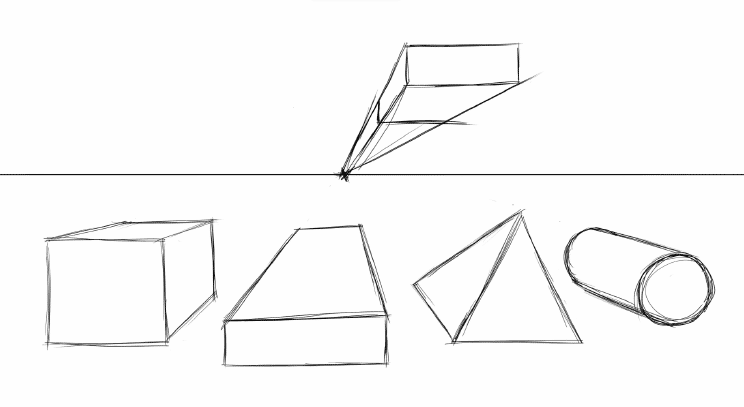
…and erase the remaining lines:

Now you have an object that’s floating in the air.
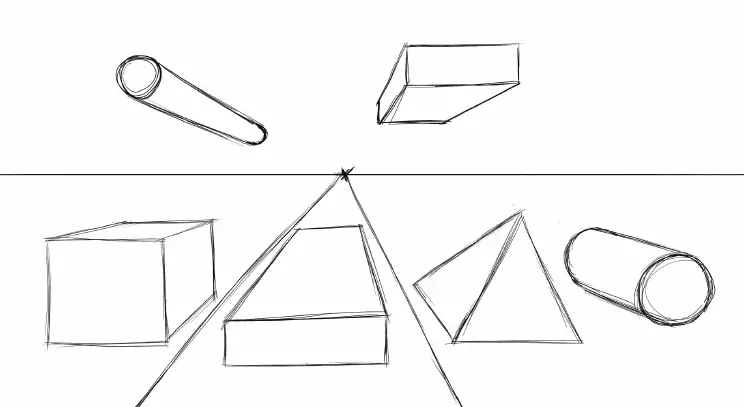
Finally, we could add two lines in the middle, coming from the vanishing point. And now we have a street:
2-Point Perspective
If you’ve mastered this basic perspective, you can move to 2-point perspective.
This is basically used most often in art because it’s more realistic. 1-point perspective doesn’t really exist in real life – but it’s useful to learn the basic principles.
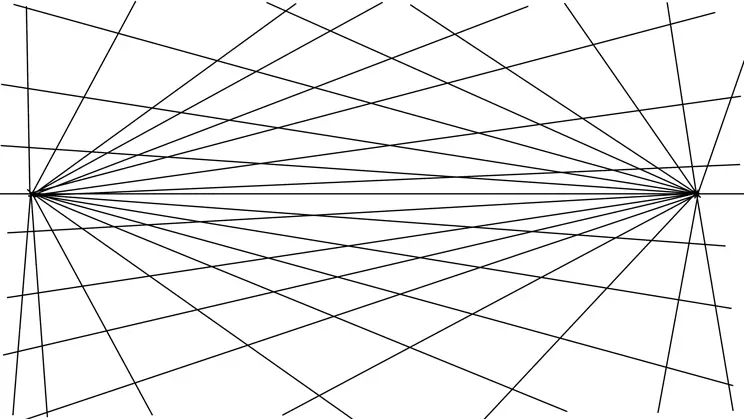
As the name suggests, you now have two vanishing points:
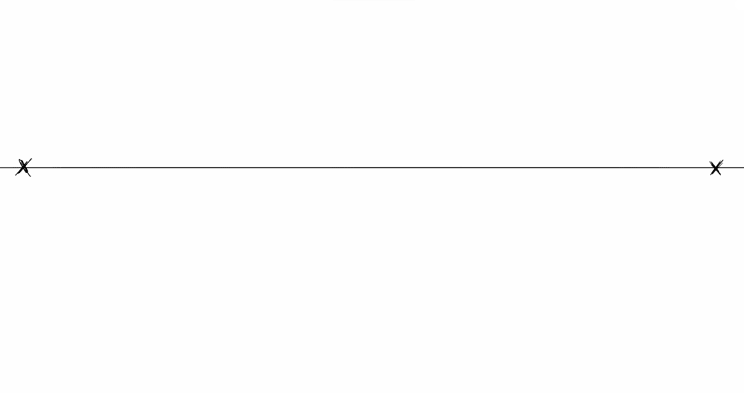
You don’t have a „front plane“ that you draw perfectly straight. Now, only vertical lines are drawn straight. Every other line goes to either the left or the right vanishing point, depending on the direction the plane is facing.
Draw A Cube – 2-Point Perspective
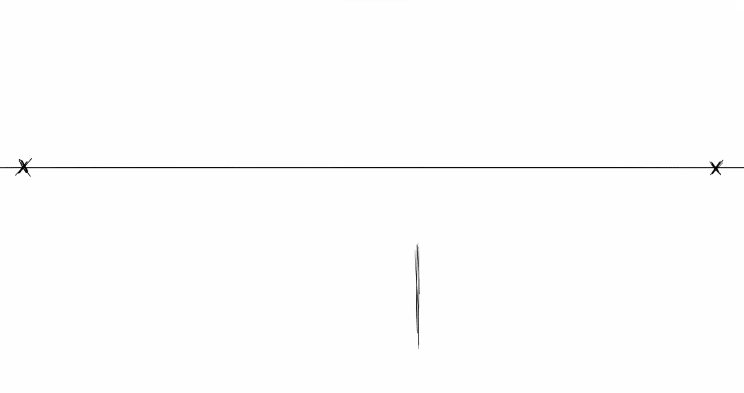
For example, let’s draw a cube.
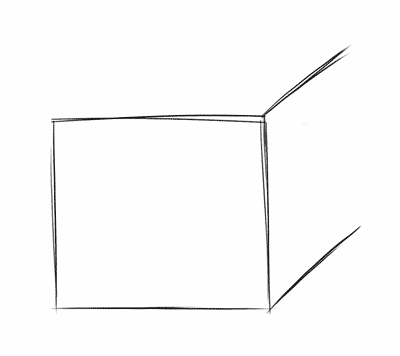
First, draw a vertical line:
Then, draw two lines from each vanishing point to the edge of the line. These will act as guides:
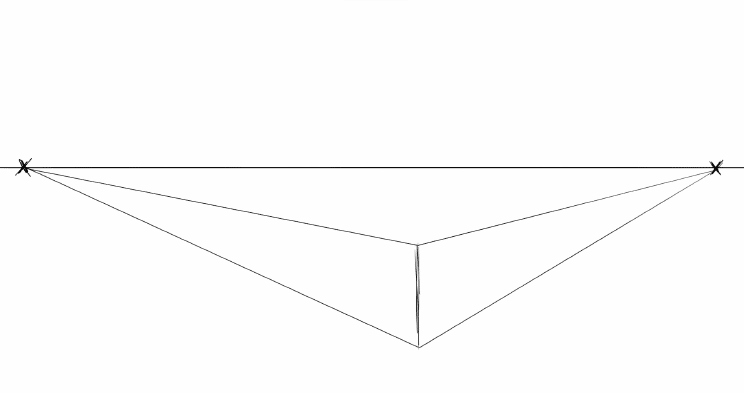
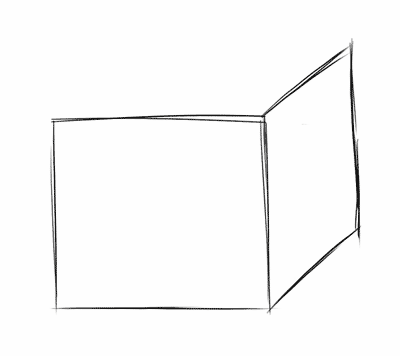
Draw along the guides to create the side planes of the cube:
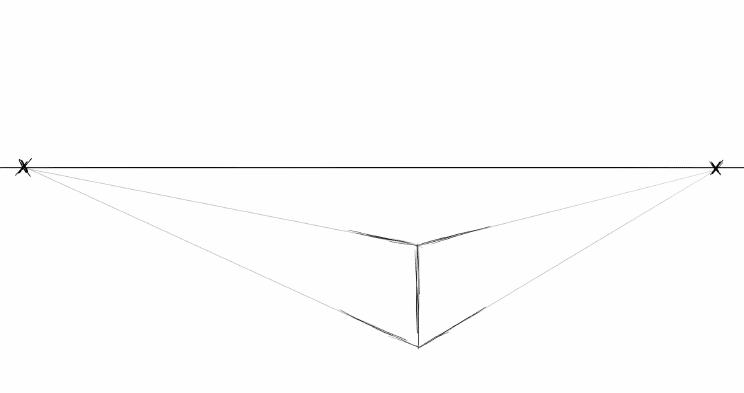
Next, draw two vertical lines to determine the depth of the cube:
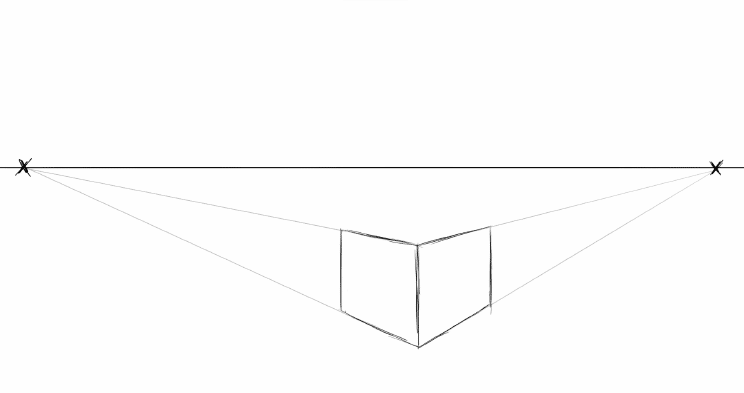
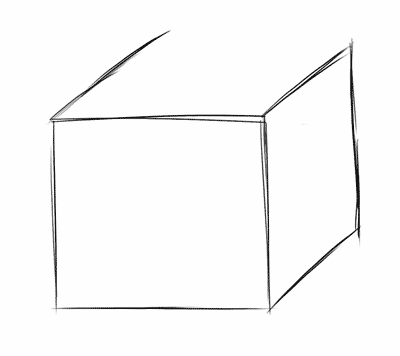
And lastly, draw guides from each vanishing point to the top of the new vertical lines you just drew:
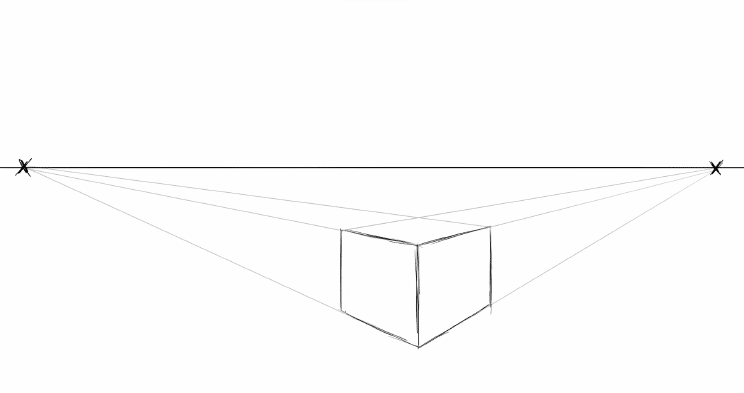
Finally, you can draw the top plane along these guides.
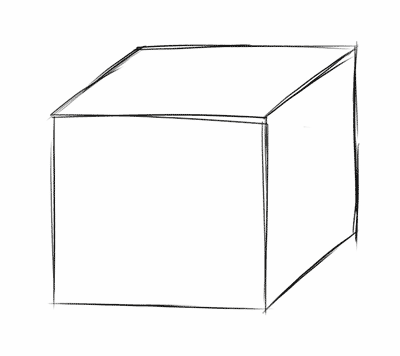
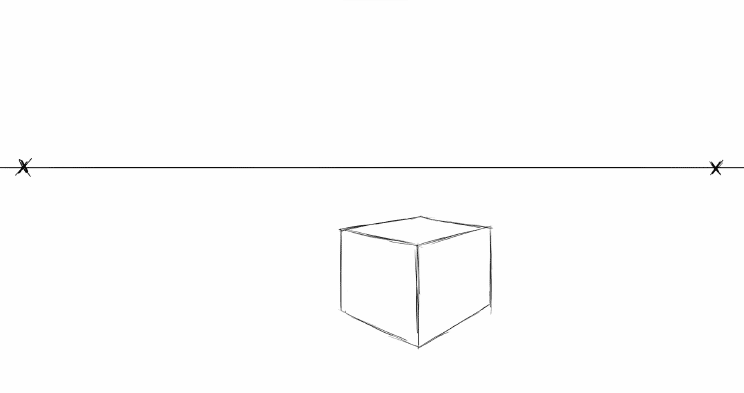
If you erase or hide the guides, you now have a cube:
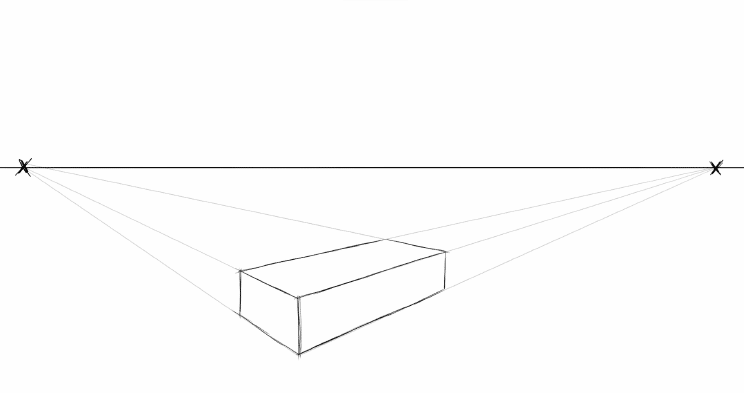
Draw A Cuboid – 2-Point Perspective
Drawing a cuboid works the same way as drawing a cube. The only difference is that the sides of the object are not the same size:
Improve Faster With My FREE e-Book!
Learn how to MASTER drawing in 5 easy steps with my FREE PDF guide!
Discover a methodical way to learn drawing effectively!
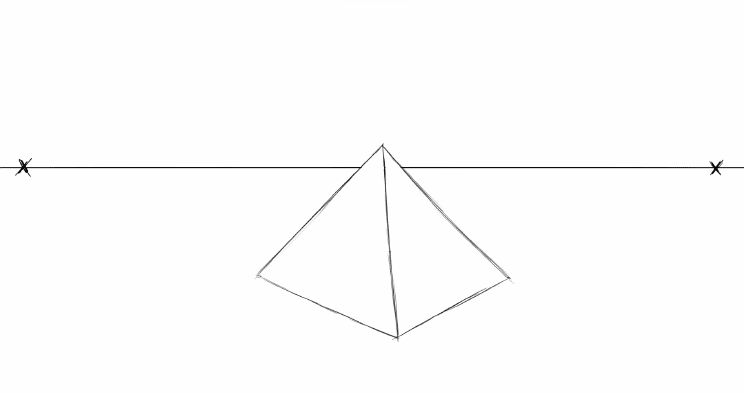
Draw A Pyramid – 2-Point Perspective
To draw a pyramid in 2-point perspective, we need to establish the ground plane first.
Draw a line from each vanishing point until they cross:
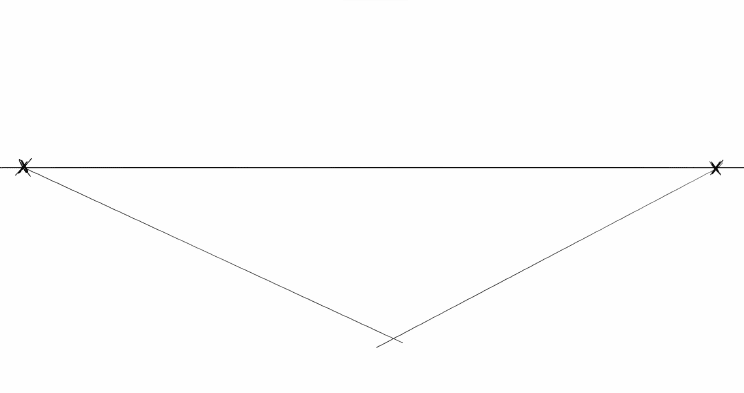
Then, draw two more lines above the first lines: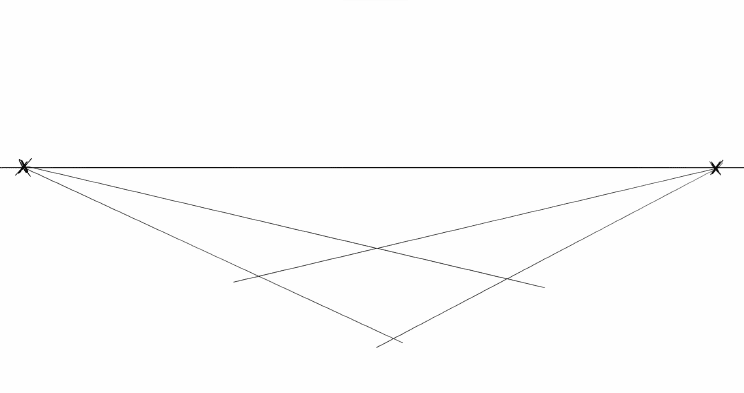
Now you can draw the ground plane: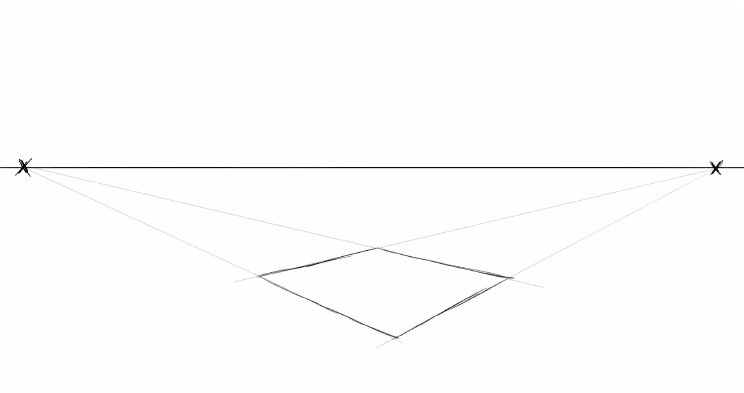
To make sure that the tip of the pyramid is exactly in the middle, we need to find the center of the ground plane.
To do that, connect the edges of the ground plane: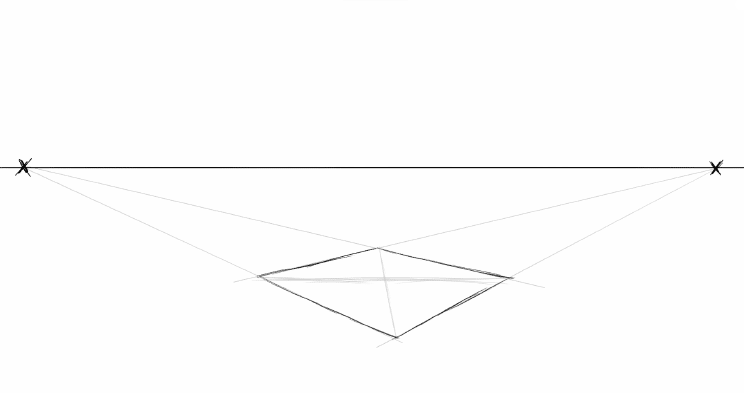
The point of intersection is the middle: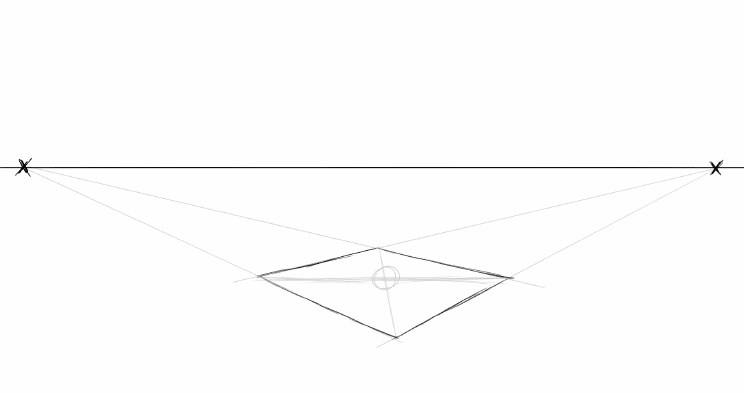
Now draw a vertical line starting from that point: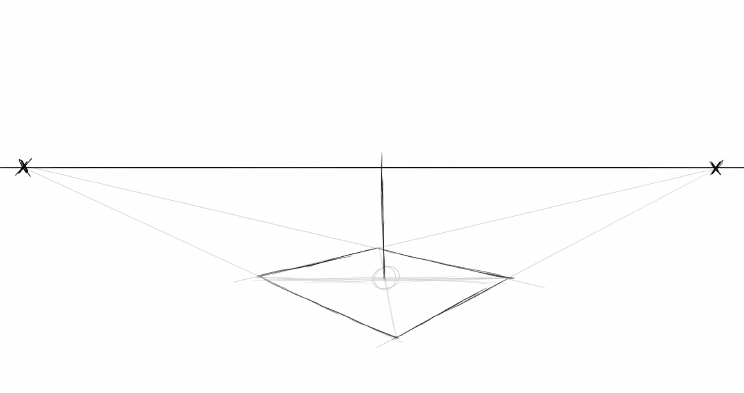
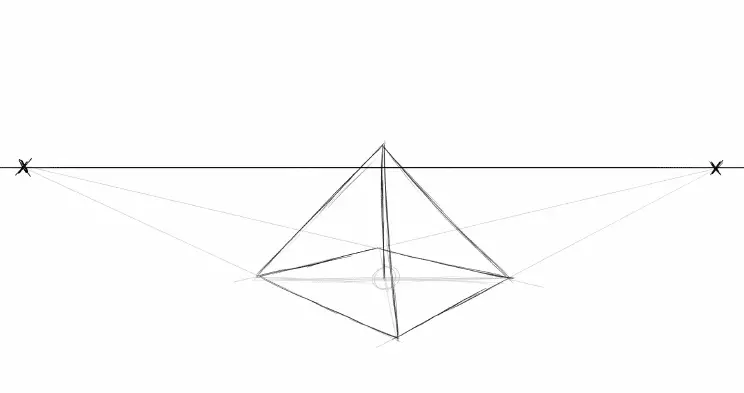
Finally, just connect the edges of the ground plane with the tip of the pyramid:
Draw A Cone – 2-Point Perspective
To draw a cone, we can start the same way as we did with the pyramid: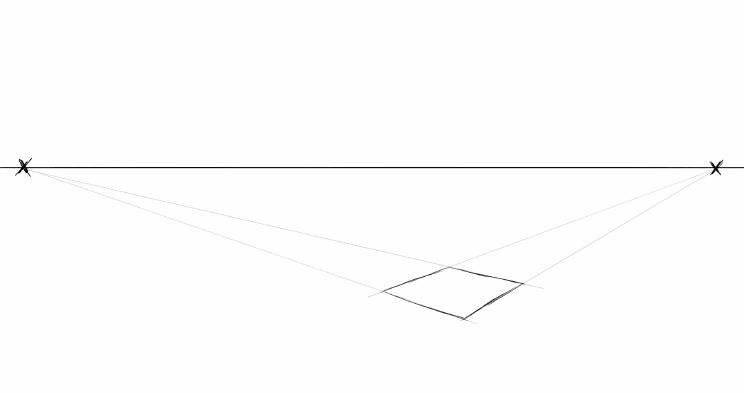
Once the ground plane is established, we can now draw an oval inside it:
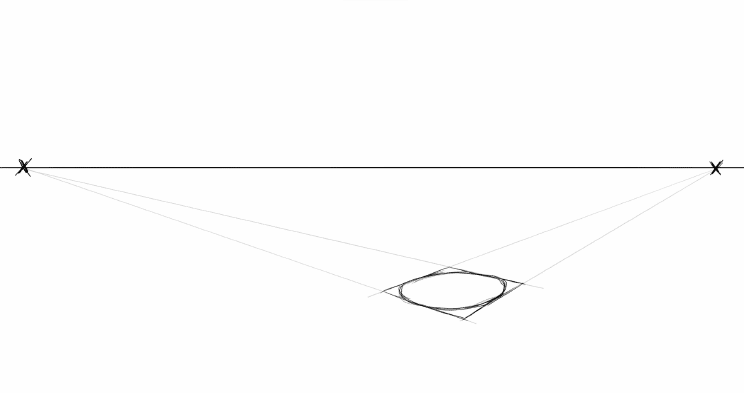
Again, we establish the middle of the ground plane…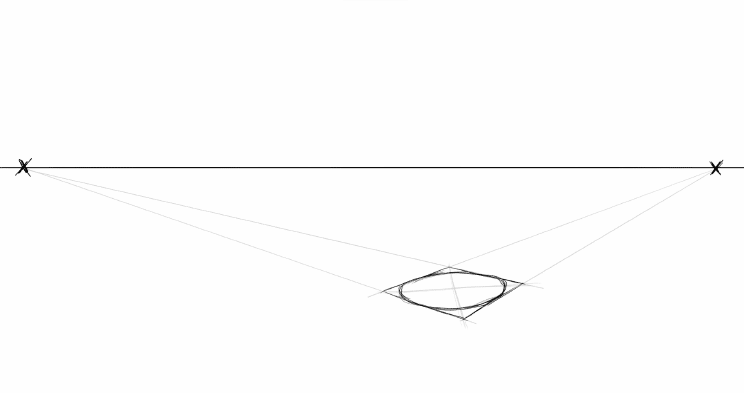
…and draw a straight line upwards: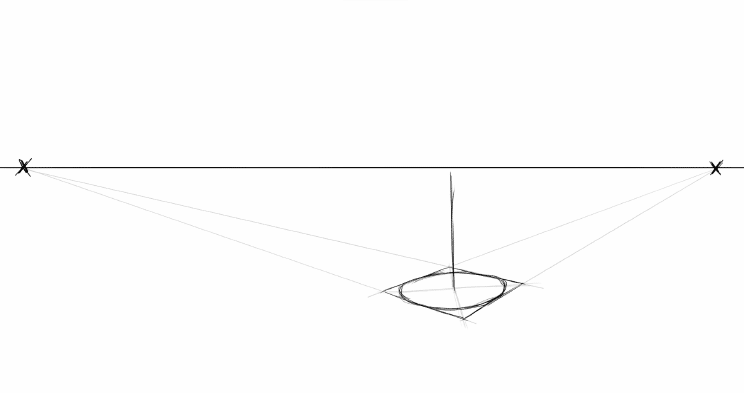
Lastly, we connect the edges of the oval with the tip of the object…
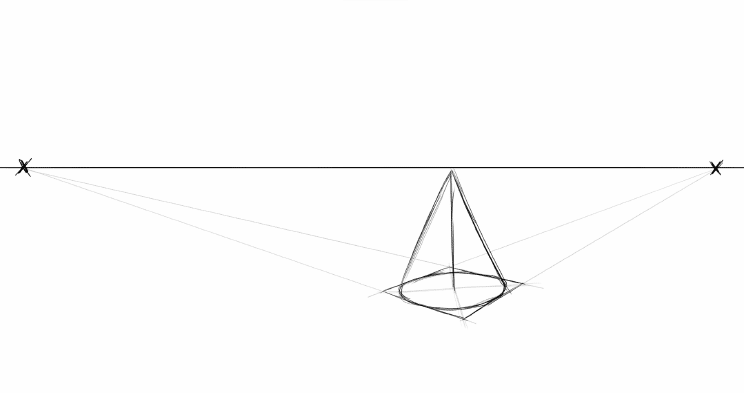
…and erase all superfluous lines: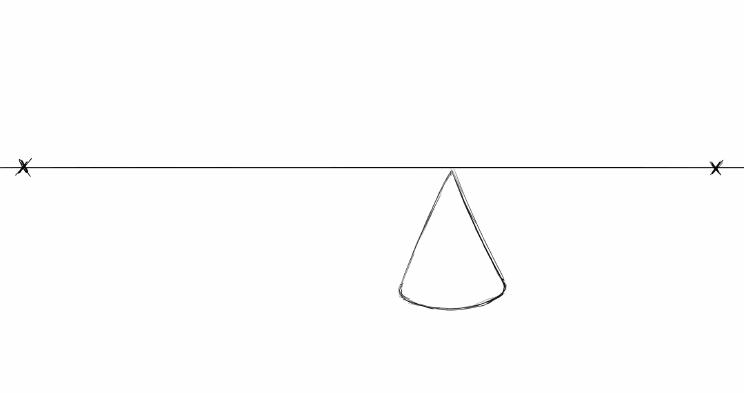
Draw A Cylinder – 2-Point Perspective
The last missing form is a cylinder.
I think the easiest way is to draw a cuboid first which can act as a guide for the cylinder.
So, let’s draw two cuboids – one lying and one standing: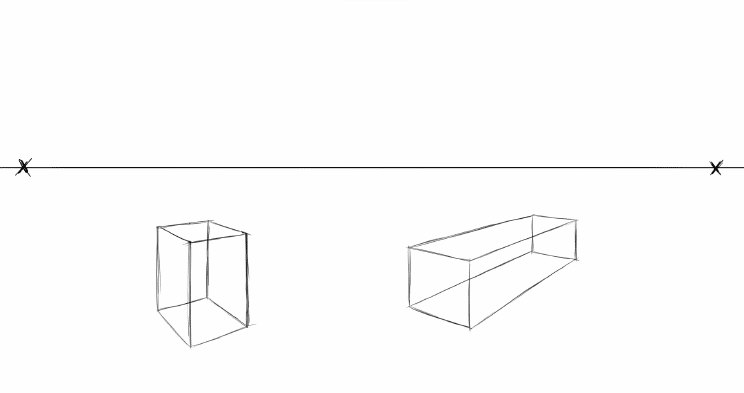
Once you’ve done that, you can now draw ellipses inside the sides of the cuboid:

Now, all you need to do is to connect the two ellipses with straight lines…
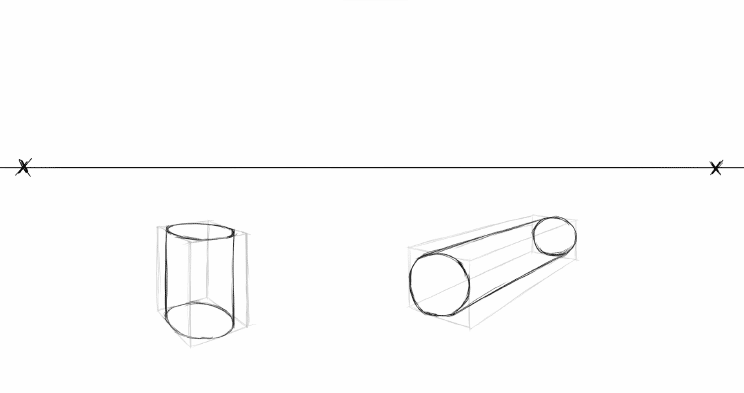
…and erase all lines that made up the cuboid. And also erase the parts of the cylinders you wouldn’t be able to see: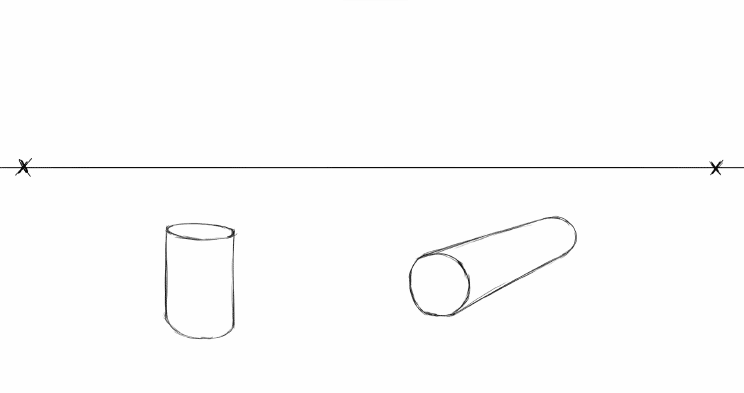
All this might be a bit overwhelming at first, if you’ve never drawn like this.
But I’m sure, with a bit of practice, you can get the hang of it.
And when you can draw these simple forms in 2-point perspective correctly, you should be able to draw a city already: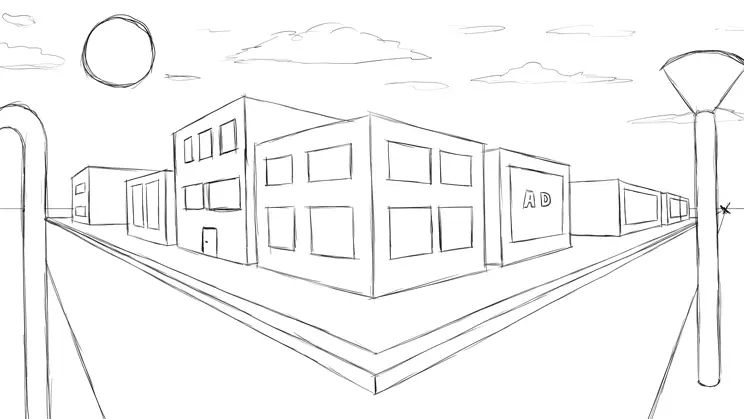
Because most buildings are simple cuboids. The sidewalk as well. Poles are just long cylinders. Windows on buildings can be just rectangles. You get the point.
Now, you might be wondering how this will help you, if you want to draw something more organic, like animals or people.
That’s where the next fundamental comes in:
Step 5 – Construction
The cool thing is, that what I just taught you is the foundation for everything else you might want to draw. With these basic forms you can, in theory, draw everything you want.
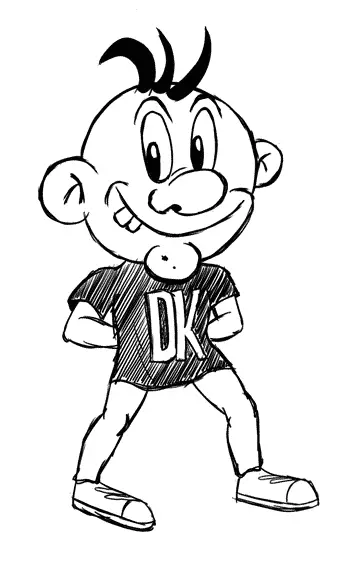
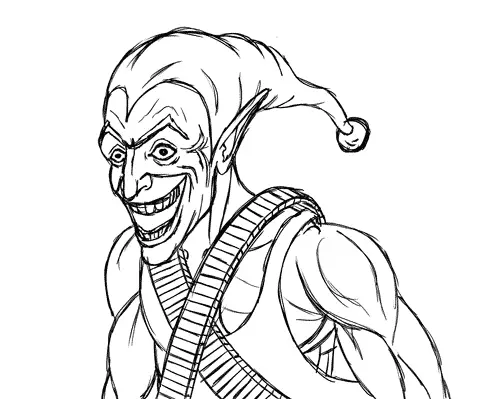
For example, you could put together a drawing of a simple character with just a few balls or circles:
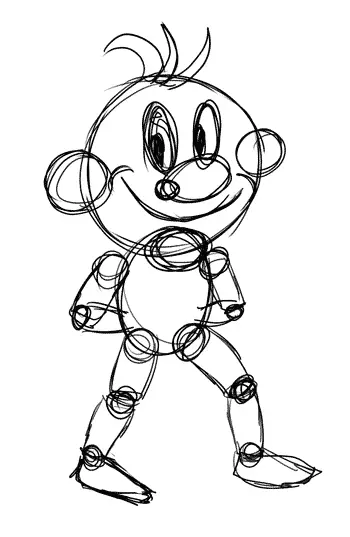
In this case, they represent the head, the torso, the eyes, et cetera. The arms and legs are basically cylinders.
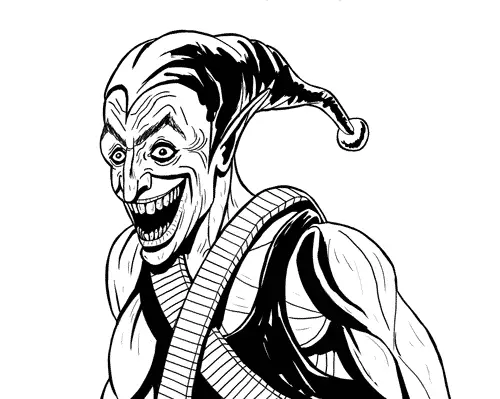
This serves as a base over which you can then draw a more refined drawing, so that you don’t actually see the basic forms anymore:
The same approach also works for more realistic drawings. In this case I’m constructing a human:
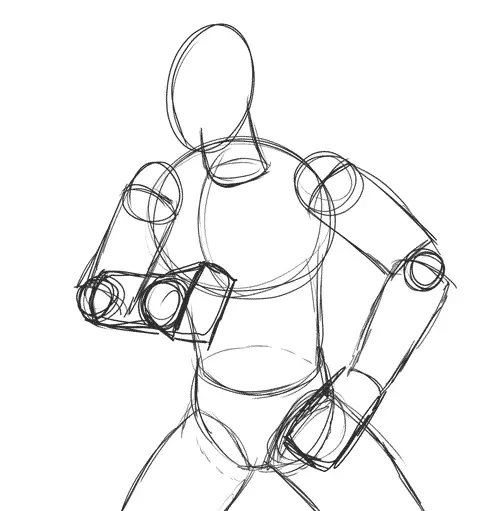
An egg shape for the head, circles or ovals for the chest area and joints and cylinders for the arms, legs and neck.
Of course, this is far from realistic. But it serves as a base to get the general shape, proportions and perspective right.
With a bit of knowledge of anatomy, you can then go ahead and add more defined shapes that resemble the muscles, for example:

This is the next step and obviously requires you to learn anatomy and do a lot of studies from photos.
The same can be done with a head for example.
There are actually complete systems for drawing a head, like the Loomis Method and the Reilly Abstraction. I made a YouTube video about these already – take a look:
With time and practice, you don’t need to depend on construction as much anymore. But it’s important to learn and always good to come back to.
CHECK OUT: Why Can’t I Draw Faces? These Are The 5 Reasons Why
Digital Drawing Tips
Actually, digital drawing is not that different from traditional drawing.
The way I see it, there are three main benefits to drawing digitally:
Undo, layers and Perspective Grids.
1. Use The Undo Shortcut (CTRL + Z)
You probably know the universal keyboard shortcut CTRL + Z. It works in most computer software.
It undoes the last action you just performed.
You can do this in all digital painting programs, too.
Because of this, you don’t really need to fear drawing a stroke on your canvas. Even if it’s bad, you can immediately undo it and try again.
This might feel like cheating to some people, but actually, it’s the same as erasing pencil lines on a piece of paper. You can do this digitally, too, with the eraser tool. But CTRL + Z is just faster.
A word of warning:
Try to not overuse this shortcut. Otherwise, you might end up in a perpetual cycle of not committing to a line. Ever.
2. Use Layers
Layers are another thing that is really useful in digital drawing.
In pretty much all painting software you can add several layers on top of each other.
It’s like drawing a sketch and then putting tracing paper on top to create a more defined drawing.
When you add a layer in a digital drawing, you can continue working on your sketch, but now everything you draw is on your new layer and doesn’t affect the original sketch.
This way you can build a drawing from the ground up, step by step.
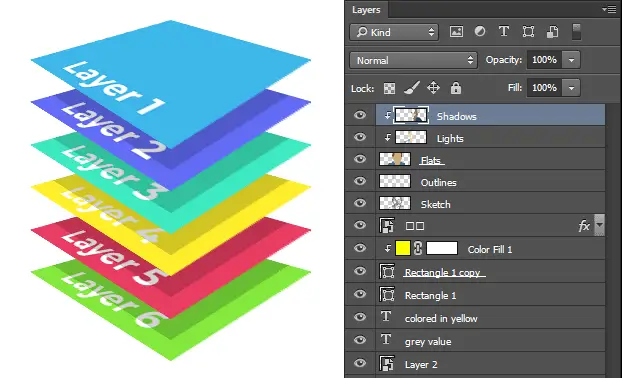
You can start by drawing a very rough scribble on the first layer:
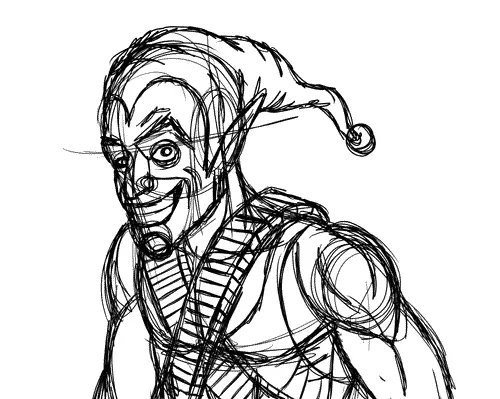
Then you add another layer and draw a more refined sketch on that:
Finally, you can add another layer and draw an intricately detailed drawing on top:
The cool thing here is that you can lower the opacity of each layer anytime. Which means that it’s more transparent and doesn’t distract you from what you’re currently drawing on your active layer.
Another way to use layers, that I personally use pretty often, is to use them for different stages in your drawing or painting.
Whenever you reach a point in your drawing that you are unsure about, save your document and just create a new layer.
This way you have the opportunity to experiment a bit and try things out. And if it doesn’t work out, no problem – you can always go back to the last stage, without destroying your whole artwork.
3. Perspective Grids
When drawing something in perspective, you can do it like I just showed you: Draw individual guides for every object you draw.
Another way is to draw lots of guides beforehand and draw your objects along those lines:
Digital painting software makes this easy.
Instead of having to draw hundreds of lines by hand, you can use perspective grids.
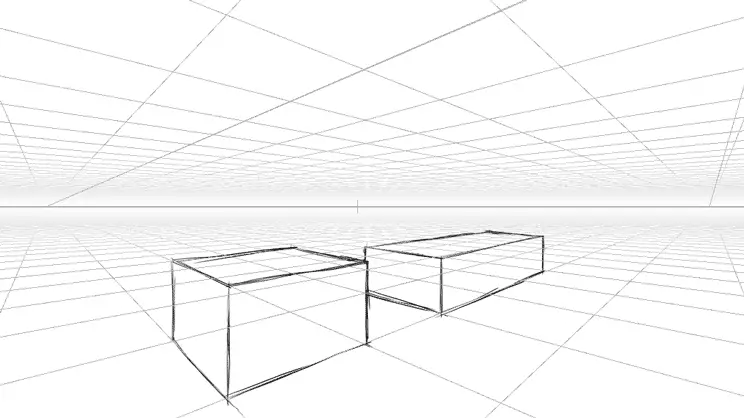
In this case I’m using the free software Krita which has a tool for this. This allows me to put down a horizon line and add as many vanishing points as I want:
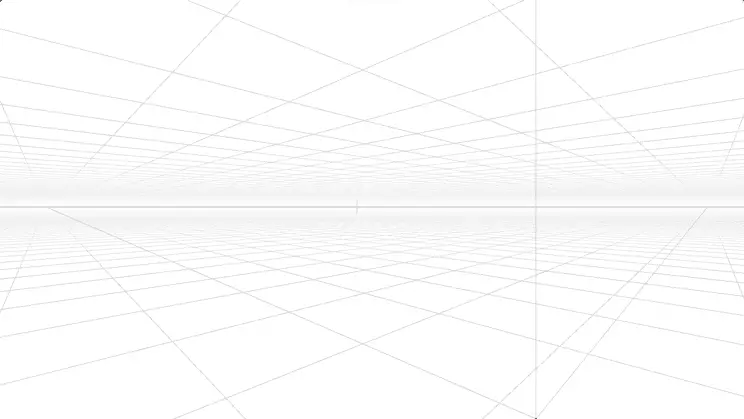
And as you can see, it automatically creates many lines to draw along.
This way you can practice drawing basic objects or draw a full scene in perspective quickly.
What To Do Next
Try these different levels out and practice each stage as long until you get sufficiently good at it.
To get as good as the pros, you need to know how to practice right, though. I recommend you watch this video of mine, where I show you five ways to practice drawing that can really accelerate your progress:
READ NEXT:
How To Get Great At Drawing Fast: The Best Way To Practice
58 and always wanted to do this. I came across this website and decided today’s the day. Thanks for the clear instructions. I have a lifetime of ideas I’d like to express in an animated form. I’m hoping by following these instructions I’ll finally begin the journey of creating something real from my ideas. I’ll check back in a month from now. This will give me accountability. Thanks again.
Very cool! I’m glad you like it and hope my little guide will help you to create some amazing art in the future. 🙂
i will back. very insightful! thks.
No problem!
Thanks for sharing this, Its with such structural organization of basic concepts that great artists are made. I’ll keep this as a reference for both teaching and learning.
Thanks for the kind words! It means a lot. 🙂
I am helping a little girl draw better, so I am going back to the basics, and wow!
what a massive improvement! thank you so much for your expertise and making it in little concrete steps!!!
You’re welcome! I’m happy to help! 🙂