Note: This post contains affiliate links. As a Skillshare Affiliate and Amazon Associate I get commissions for purchases/signups made through links in this post.
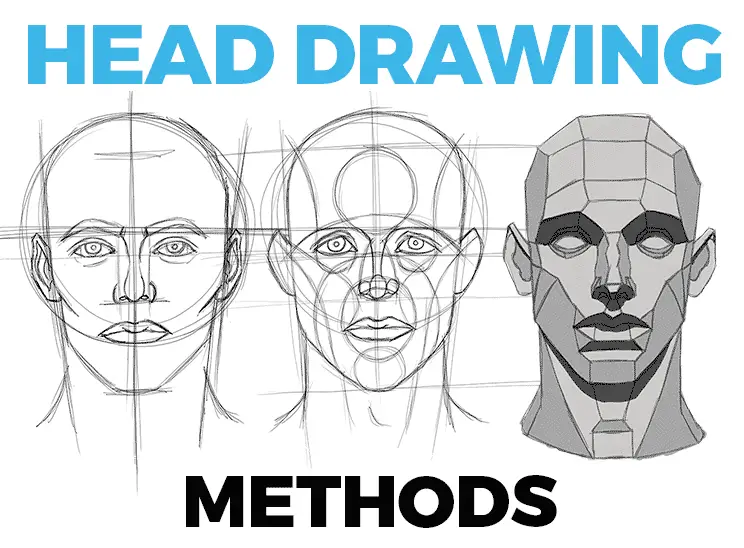
Table of Contents
What Is The Best Method For Drawing Heads?
The best head drawing methods are the Loomis method, the Reilly abstraction and the Asaro head. They are probably the most popular methods and tools for drawing a head.
But which one should you use when? And if you can’t draw faces, where exactly do you start?
To find out, let’s first look at each one by itself.
The Loomis Method
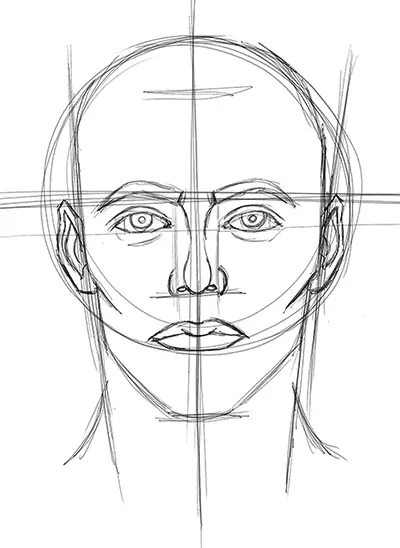
The Loomis method is a step-by-step system to draw the head that was developed by Andrew Loomis. It’s present in most of his books, but is described in most detail in Drawing The Head And Hands from 1956.
It breaks the basic structure of the head down into simple forms.
In a nutshell, the method works like this:
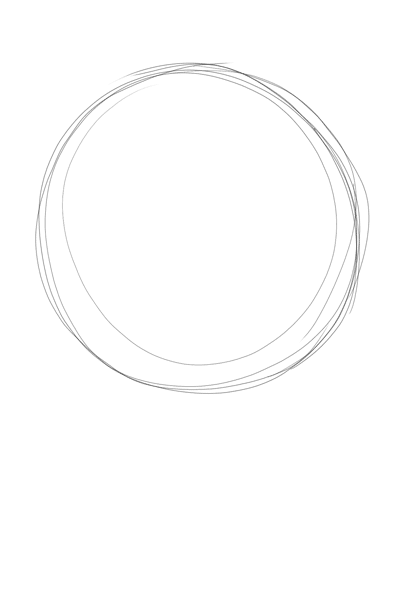
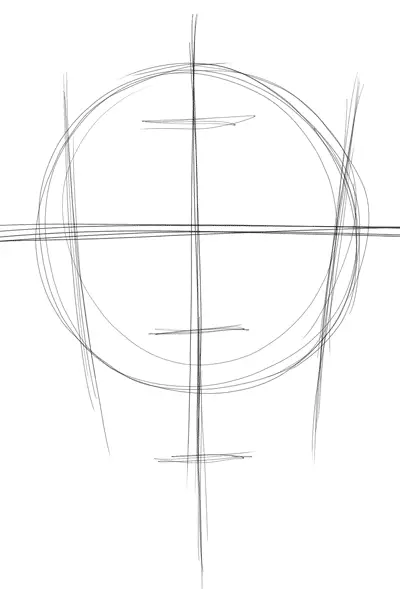
It all starts with a ball:
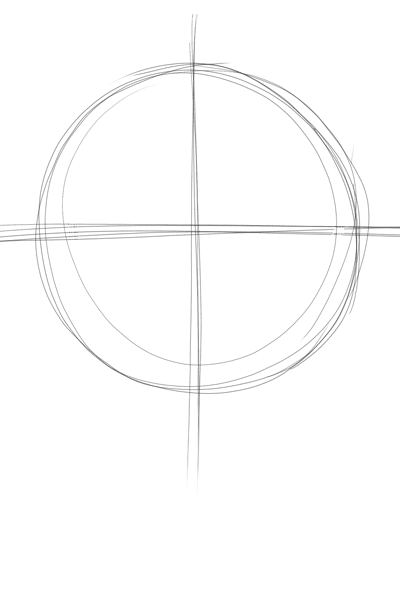
You then draw vertical and horizontal center lines:
Then you slice off the sides:

Then you lengthen the center line of the face and divide it into three equal parts:
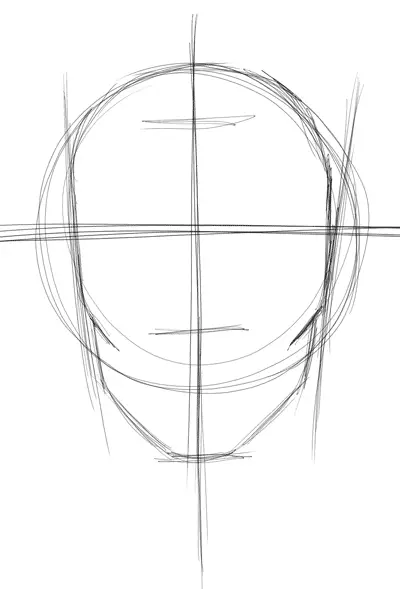
Then you draw the jaw and the general head shape:
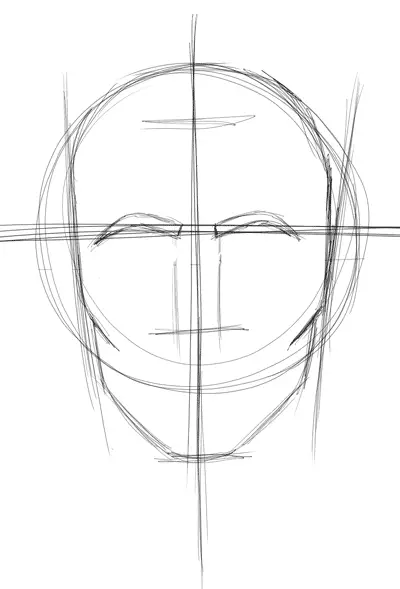
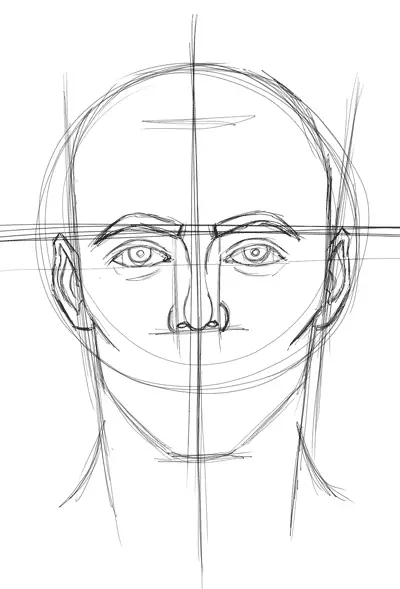
And finally you place all the features: the eyebrows …
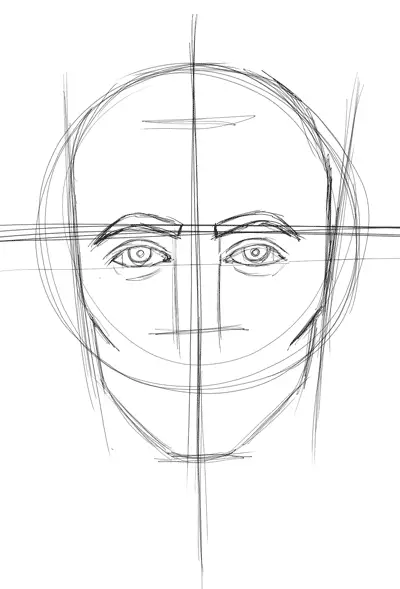
… the eyes …
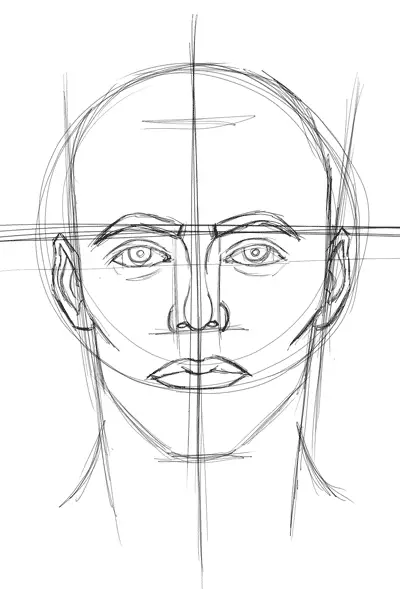
… the ears and nose …
… and finally the lips:
With all the guides and simple shapes, the Loomis method helps you get the basic structure and proportions right and it shows you how to place all the features correctly.
It can produce solid results for beginners quickly.
Also, it allows you to draw the head from any angle:
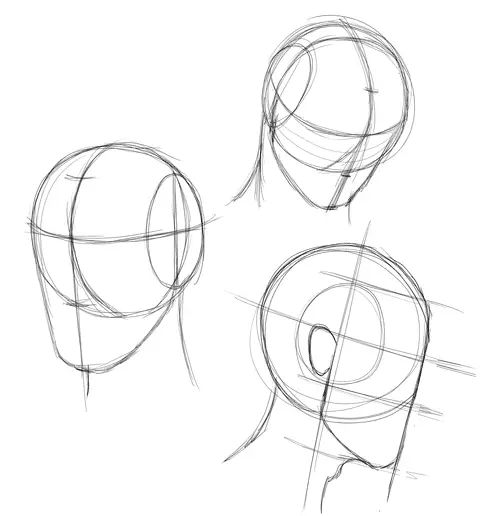
To do this, you have to rotate the sphere in perspective and draw the center lines around the sphere. You need to think in three dimensions instead of just two.
CHECK OUT: How Anyone Can Draw A Stunning Side Profile In 13 Steps
While the basic front view of the Loomis method is quick to learn, this 3D view is much harder. It requires some experience drawing simple forms in perspective correctly.
The Reilly Abstraction
The Reilly abstraction was created by Frank Reilly at the beginning of the 1900s. Reilly never published a book on it, but he taught it in art school for about 30 years.
The Reilly abstraction describes the head differently than the Loomis method.
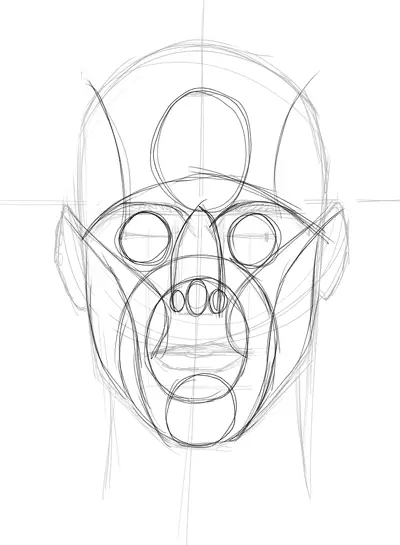
Instead of being rather technical and focusing on straight construction lines like the Loomis method, the Reilly method focuses more on rhythm and flow.
It shows how all the facial forms connect and kind of „flow“ into each other.
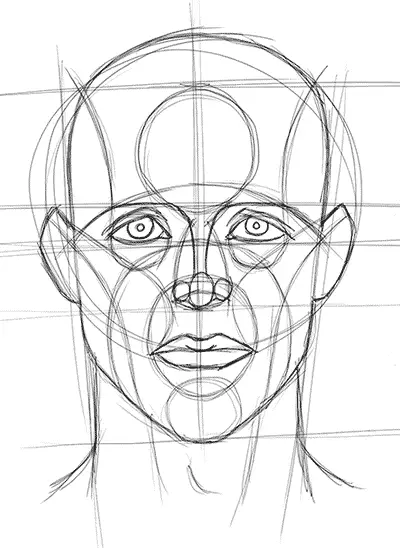
The method uses a lot of circles and curved lines to emphasize the rhythms of the face.
To do this, it incorporates not only the basic structure of the head, like the Loomis method, but also things like bones, muscles, wrinkles and other anatomical details.
For example, it uses circles for the eyeballs and the chin and curved lines that kind of represent the cheekbones:

Therefore, it’s more useful, if you already have a basic understanding of proportions and anatomy.
You can learn about this method in the book Mastering Drawing The Human Figure by Jack Faragasso who was actually a student of Reilly.
The Asaro Head
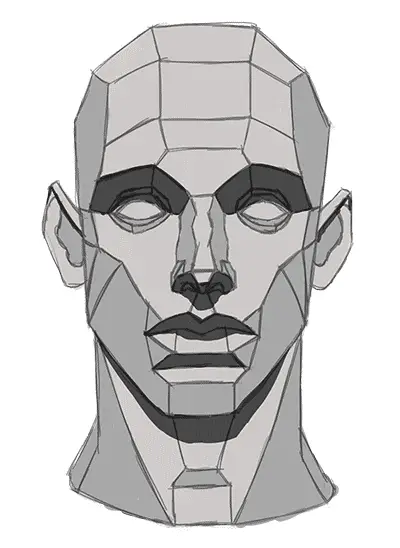
The Asaro head is a different animal altogether. It was invented by John Asaro in 1976 and is a simplified model of the planes of the head.
You can actually buy a real one on www.planesofthehead.com.
Typically, it’s not used for constructing a head drawing. It’s too geometric for that.
Its purpose is to act as a model for light and shadow. Shading is a complex topic, but the simple planes of the Asaro head can help you understand it faster.
Unlike the Reilly model, the Asaro head is rather simple and doesn’t show any muscles or something like that. The shapes are kept basic, so you get a clear separation between light and shadow.
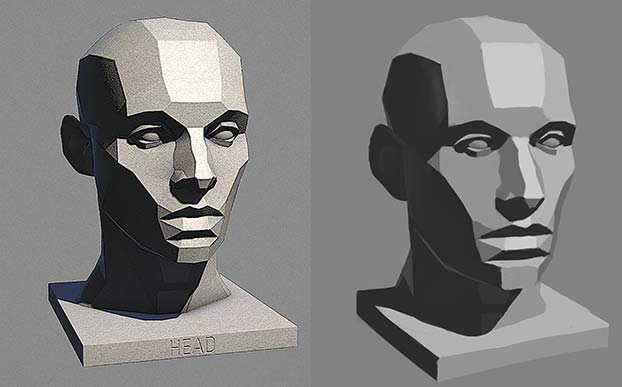
When you have drawn your head, you can use the Asaro head as a reference for how light and shadow fall on a head.
Just put the Asaro head under a specific light source to achieve the lighting you want and use that as a reference:
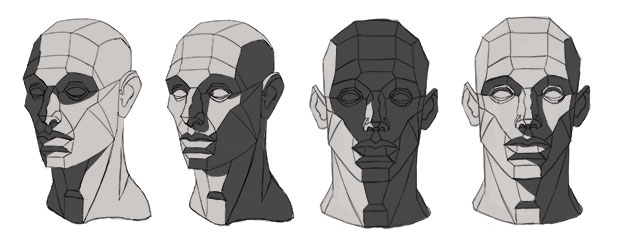
Apart from using it as a reference, you can also use it to create basic light and shadow studies with simple exercises:
I recommend checking out my article about the Asaro Head where I describe this in detail.
The Differences Between The Head Drawing Methods
Plot Twist:
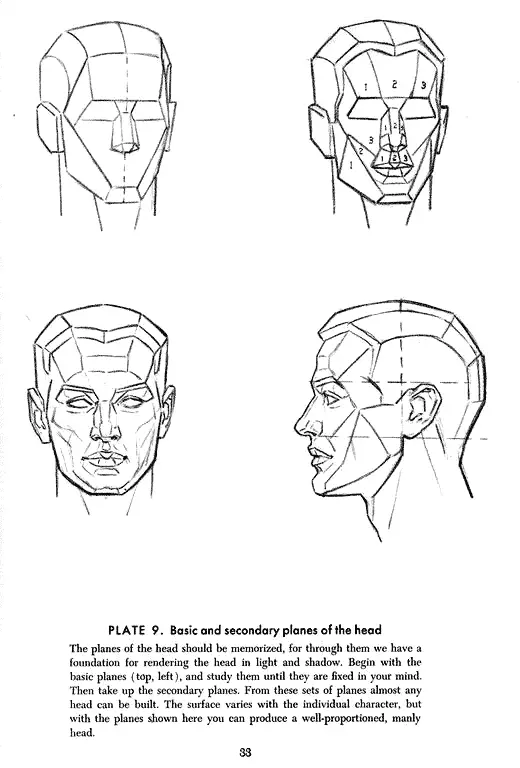
When talking about the Loomis method, everyone just thinks about the basic construction method. But did you know that Andrew Loomis actually had his own version of the Asaro head?
That’s right, 20 years before the Asaro head was invented, Loomis showed a similar model in his book. He called it basic and secondary planes of the head:
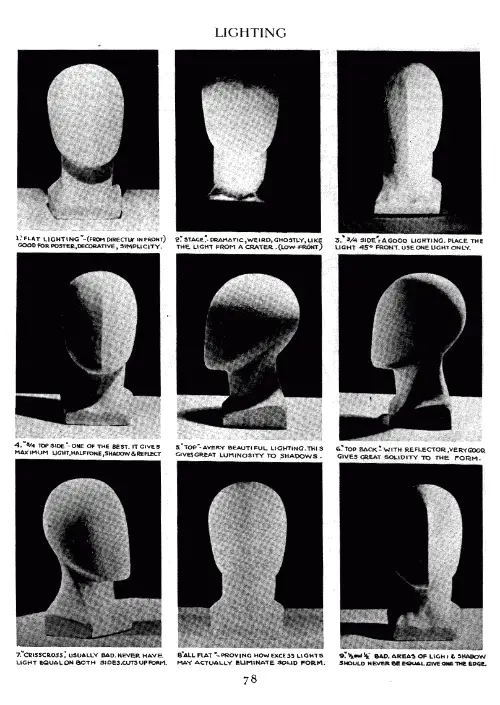
Also, way back in 1943, he used a simple mannequin head to show some basic lighting situations:
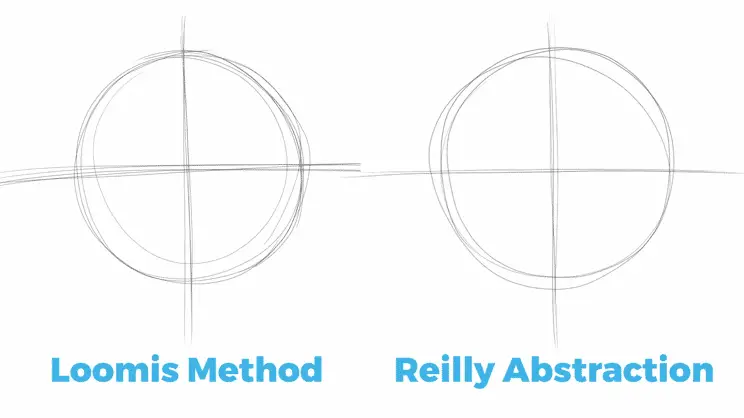
Another thing is that the Loomis method and the Reilly abstraction look somewhat different at first.
But if you compare them, actually both methods start with a simple sphere:
And in both methods, the sides are cut off:
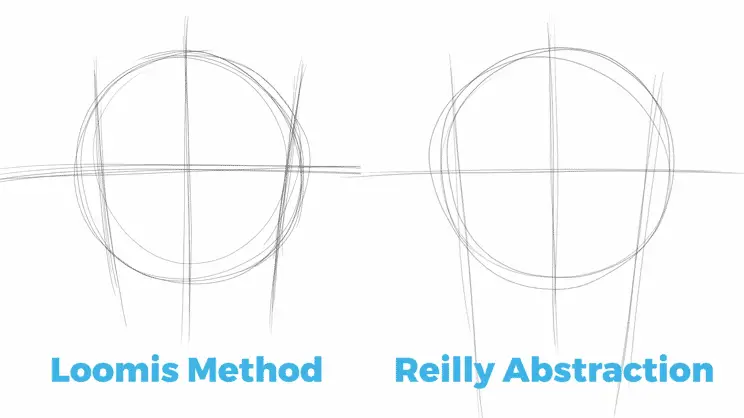
So, altogether these head drawing methods aren’t as different as you might think at first.
Still, all of them have their place:
CHECK OUT: My Recommended Art Equipment
Loomis vs Reilly vs Asaro
In isolation, each one has a specific advantage:
- The Loomis method is great for beginners to learn the basic construction and shape of the head. It also offers a useful step-by-step process.
- The Reilly abstraction is good for making your drawings more rhythmic and flowing and making them look less „constructed“.
- And the Asaro head is a useful tool when you try to learn lighting and shading.
Improve Faster With My FREE e-Book!
Learn how to MASTER drawing in 5 easy steps with my FREE PDF guide!
Discover a methodical way to learn drawing effectively!
Which Head Drawing Method Should You Use?
And this is actually a good sequence to follow:
Try the Loomis method first, to get familiar with the basic shape of the head.
Once you’ve gotten the hang of it, try experimenting with the Reilly abstraction to put more flow into your drawings:
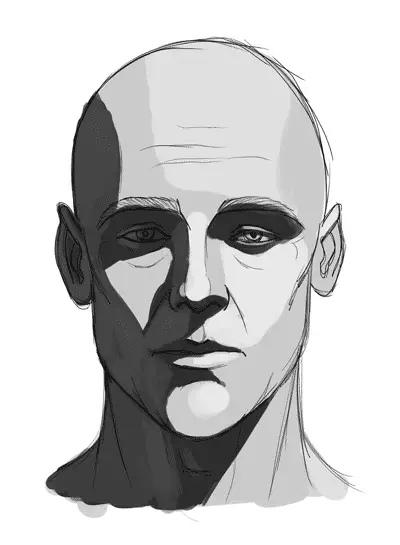
Finally, use the Asaro head to learn how light and shadow fall on a head:
And actually you can use this exact sequence on one specific drawing, too:
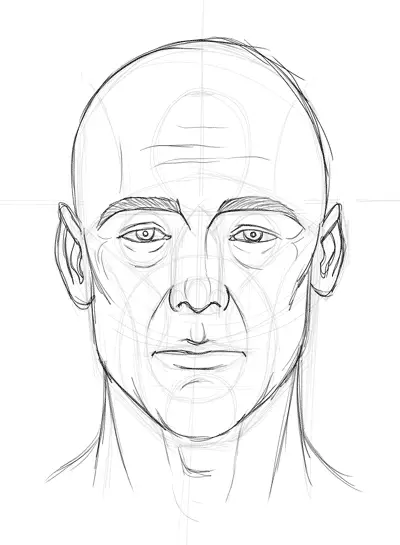
Start with a basic Loomis head …

… draw flow lines from the Reilly method on top …
… and draw your final lines on top of everything.
Finally, use the Asaro head as a shading reference:
But, as John Asaro himself said:
“This knowledge of the head is only a start. One must find his or her own path.”
There comes a time when you will probably break the rules.
You will break free of these constrained models and the exact step-by-step process.
The more heads you draw, the more intuitive your ability to draw the basic head shape will be. And you will kind of get a feeling for getting the proportions right without hundreds of lines to guide you.
The more experience you have, the less you will depend on drawing the exact construction every single time. You might even find that you end up mixing and matching certain elements from different head drawing methods. Use what’s useful to you and discard what’s not.
And still, you can always fall back on these basic methods of construction whenever you feel stuck. Or when you’re trying to draw new or extreme angles.
Going back to the basics is always a good idea.
READ NEXT:
Why Can’t I Draw Faces? These Are The 5 Reasons Why!
I spent most of my day reading your “Why I cant draw a face”; it was most
helpful; then I attempted to follow all directions to complete my task using 2 styles.
For me Loomis was my most productive. I understood all directions having just learned how “artists” talk. Enjoy your easy style of expression. I tried the Rielly
style which was harder for me to see points of reference; but surprise my project was was good and the head came out looking female. Nice touch. I will try to locate
your sessions. You have helped me see what I hope will be good one day; got to
learn fast cause I am 78 years young. Don’t dismiss me due to age. Bye, Kate
not bad and the head was female. Don’t know how that happened.
Very cool, Kate! You’re a prime example that it’s never too late to pick up drawing. 🙂 Love that you’re making progress and I could help you out a bit! Yes, the Reilly method is a bit weird for beginners, but it can still be useful to get a good “flow” in your head drawing.
Loomis is great for placement -Reilly is really great for faces with expressions -dimples wrinkles etc -I an trying to do a -mostly- front view of Bella Lugosi as Dracula but my initial attempt looked too cartoonish and stiff. So incorporating all three methods helped a TON!
Great! Yes, a mix of them all can be best! Do what works for you. 🙂